
Guide to Iceland
By far our the top email we get is recommendations on visiting Iceland. The country is hot right now and for good reason! Iceland is magical in every way. So rather than answer everyone individually, we thought it would be best to produce our first destination guide. Iceland awaits!
Intro: WhereverYouLand's Guide to Ring Road
Since we left in late March, a guide to Iceland has been by far the most requested item from folks back home. Iceland is HOT right now and after we visited in March, we can certainly understand why (take a look at our photo gallery for proof)! The beauty, diversity, tranquility and truly wild landscapes make this place unique. You really cannot have a bad trip to Iceland, no matter how long you go or what you decide to see. We believe there is NO wrong way to do Iceland, but here are some of our thoughts on how to enhance the experience and cover a lot of ground. Hope you enjoy it!
General Notes on Iceland
Before we get into the nitty gritty, there are a couple of takeaways we have from visiting Iceland that need to be addressed:
1. You will be stopping to take pictures…A LOT. But don’t be stupid!
Everywhere you look is gorgeous. If you are driving yourself, you will want to stop a lot to take photos. However, much of Ring Road is a single lane, without a shoulder and people fly (speed limits are a loose guideline). We saw plenty of tourists who just stopped in the middle of the road to take pictures. Don’t be that person! Not only is it dangerous, but there are plenty of places to pull off safely and get your shot…
2. Iceland is a land of extremes, mainly extreme WEATHER.
One minute you will be in a lush valley, the next you will be in snowy mountains. However, if you want to see extreme: get ready for the weather. We had stretches of a few hours where we literally encountered all four seasons. The weather can change drastically in minutes. Be prepared and just know there is no reliable forecast. Just be patient and hope you get some luck when you are out and about.
3. The country is expensive.
You can do Iceland on a budget, but the country is expensive. Food & gas were elevated (even for us who were coming from New York City), but alcohol is on a whole other level. If you want to have a glass of wine or beer with dinner, we would urge you to hit the duty free in the airport when you arrive. Food for thought: we bought 4 beers one night at a bar and spent over $60. Yes, over $60…
4. The people are extremely kind (but again see point #1).
Don’t be afraid to ask for help. The people we encountered were extremely friendly and even though language barriers could be problematic at times, everyone seemed willing to help. We even met a few who went above and beyond, showing us the way to a hidden hot spring or helping us navigate in a town. But remember, the Icelandic people love their country and care for their land. Don't be a bad tourist. Respect the land, respect their rules and leave this place just as perfect as it was when you got there.
How to Tackle Ring Road
While you could explore every inch of this country and not get bored, we decided to circle the iconic Ring Road. The road basically circles the entire country and in totality measures nearly 1800km. We decided to break this up into eight days (seven nights) and we found this to be about right.
We also decided the best way to explore Iceland was via Camper Van. Iceland is a truly wild place and there are tons of opportunities to park your car safely and camp for the night. Furthermore, the country is extremely friendly to campers and has tons of clean, safe sights that are established just for that purpose. We loved doing Iceland this way and would highly recommend it. We met a ton of folks who had similar ideas and the “camper-van community” was lovely and made us feel right at home. It is not for everyone, but if you want to get out of your comfort zone DO IT!
Specifically, we decided to go with HappyCampers and they were wonderful. They will pick you up at the airport (or elsewhere) and take you to their headquarters where you can gear up, get tips on outfitting your trip, as well as get familiar with the country before taking off. Our van came complete with a sofa that converted to a bed, a small sink with running water, a cooking burner, a fridge, all the utensils you would need and tons of space for us and our gear!
If you are not going the camper route, but are still a free spirit, we would highly recommend renting a car (preferably with 4WD). There are plenty of lodges to stay along the road and having a car gives you the freedom to get lost. There are tons and tons of side roads and there is no way you can do them all, but the ones we did revealed hidden treasures like untouched waterfalls, natural hot springs and beautiful landscapes we had all to ourselves.
A quick note: Iceland has some roads called "F" roads and these are roads that are not paved and tend to be very rough. There is a lot of incredible terrain to explore via the F's, but Happy Campers cannot travel on these since they do not come with 4WD. So if off-roading is your fancy, perhaps choose the right vehicle for you...
Hunting for those Northern Lights
Before we get into our itinerary, we should take a moment to talk about the Northern Lights. Iceland is a great place to try and catch a glimpse of the incredible aurora borealis. In the winter, the nights are long and light pollution in much of the country is non-existent. In Iceland, the best time to try and see the lights are between late August and mid-April.
We should note though that seeing the lights in Iceland requires a bit of luck. Not only are the lights unpredictable, but as we noted so is the weather! On many nights the cloud cover will make it impossible to see them. Iceland does do an aurora forecast, which can be accessed here and it will be helpful in giving you your best shot at seeing the lights. We were introduced to this website the first day from a friendly gas station attendant and had we not followed it, we would have missed the lights altogether. If you are lucky enough to see them, they are spectacular in every way.
Full Itinerary

Our 8-day route
Day 1 – Blue Lagoon and the Snæfellsnes Peninsula
We took WOW Air’s incredibly cheap flight from BWI that landed early, at 5:30am! It seemed to us that most flights land early in the morning. In our opinion, there is no better time to grab an airport coffee, stock up on necessities at the duty free (see above) and get a taxi to the Blue Lagoon to shake off the flight. You can even eat breakfast here when you are done.
The Blue Lagoon is very touristy but if you arrive right as the door opens at 8am, you can have some peace and quiet there before the masses of people arrive via tour bus. Just note – you need a ticket and this needs to be booked weeks in advance at their website. Full disclosure: we did not know this so were not able to go on this trip. Nolan has been before and practiced what we are preaching. If for whatever reason you miss the famous Blue Lagoon, there are plenty of other options so do not fret! If you need to check the box, do it now.
After the Blue Lagoon, arrange your pickup with Happy Campers and head to their headquarters when you are ready to get the intro to your new home. They will walk you through the full map, the gear and everything else you will need for your journey. They also have a free pantry with stuff leftover from other campers – we found a few hidden gems in there, so take advantage!

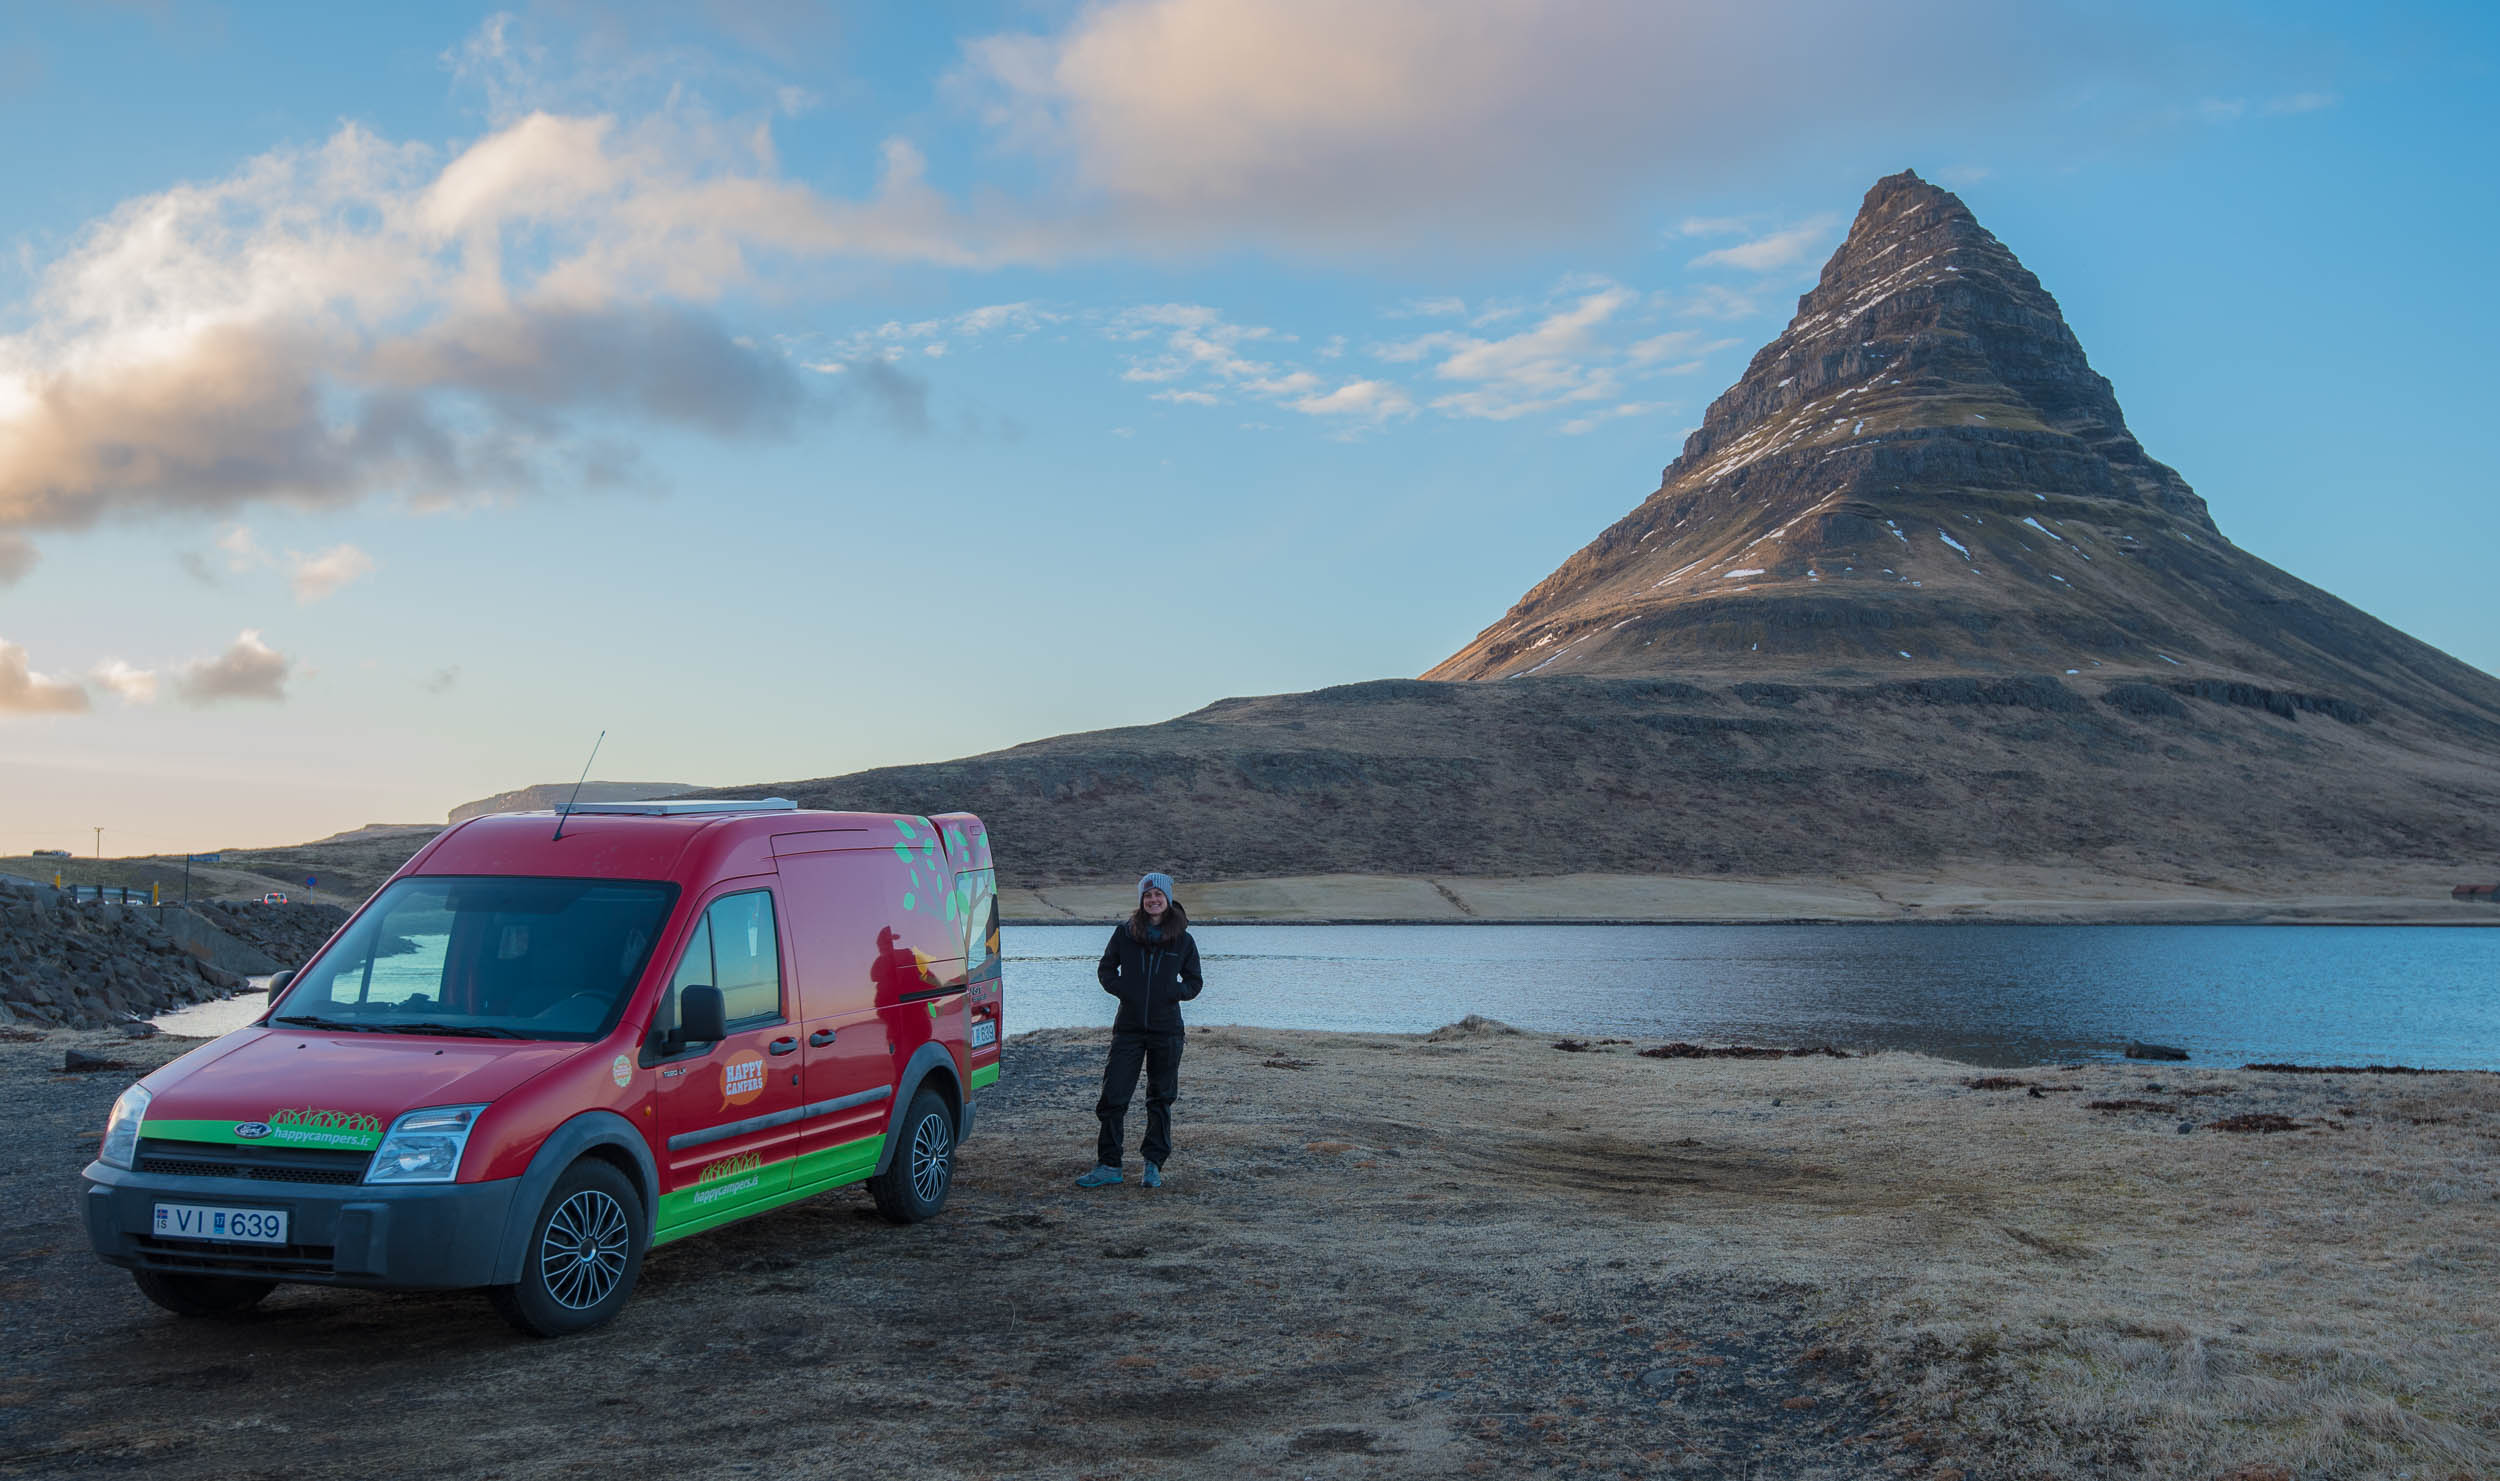
Riding dirty in our new Happy Camper!
After you are on your way, head to the grocery store to stock up. In fact, there is a great grocery store right on the same street as HappyCampers! Stock up on the essentials for your first few days. The campers come with a mini fridge, so there is plenty of space to store food. We would just say to organize carefully because stuff will bounce around on those rough Icelandic roads…we are looking at you eggs!

Our home!
After you are settled in your van, head two hours north to the Snæfellsnes peninsula and in particular go visit Kurkjufell aka Church Mountain. It is a gorgeous place to catch the sunset and to see the iconic waterfalls (Kirkjufellsfoss). Moreover, there are plenty of spots to park the van right beneath the mountain so you can have dinner with a view. If you have the energy and want to stay for darkness, the night photography here is spectacular and if you get lucky like we did, the northern lights will put on one hell of a show!
Parked for dinner!

Quite a dinner view...
Note: Since the Snæfellsnes peninsula is a bit of an offshoot in the northwest, it is technically backtracking from the rest of our itinerary. If you are too jetlagged to do the drive north, do not fear, you can hit it on your way back into Reykjavic, it will just add some time to your drive on that day…
While there aren’t any campsites directly at Kirkjufell, you still could probably sleep there if you wanted. We opted for a site about 30 minutes south on a farm. HappyCampers will provide you with a full map of van-friendly campsites, so it should be easy to navigate. Again, if you would rather relax on your first day, there are TONS of options around Reykjavic. Besides, you will want to be good and rested for Day 2.

Our first night and Iceland left a light on for us...
Day 2 – Golden Circle
Get up early and get some coffee and breakfast going. Since we are two people who NEED coffee in the morning, we used the French presses that Happy Campers provided us. However, we would also recommend our favorite travel companion, our Aeropress. Gas stations are present, but in the middle of Iceland they can be few and far between.
Once properly fueled, head back south to commence the Golden Circle route. This is easily the most touristy one-day loop in Iceland, but is jam packed with sights. If you only had 2-3 days to spare, this would be a must.

Our Golden Circle Route to Hella
Start the tour at the Þingvellir National Park. Here, you will get to see crazy landscapes including huge gorges formed by the tectonic plates under our earth’s crust.
Next, head for Strokkur Geysir, which erupts every few minutes and then go check out the world famous Gullfoss Waterfalls. These two stops will probably be the most crowded, but the good news is that both have really nice restaurants so you can get some food and coffee, if needed to survive the tourists.

Gullfoss
After Golfoss, head back towards the south passing by Skalholt Cathedral and onwards to the kerið crater to catch the afternoon rays. It is only about 20 minutes to walk around the entire crater, but just be careful there aren’t exactly fences along the trail.

Careful on the edge...
Head to the quaint town of Hella to spend the night at the amazing Arhus Campground. The campground is great for spending the night and has a common building with an amazing kitchen, showers and wifi. Another nice bonus is the town of Hella has a great pizza restaurant that also does takeout. If you are already missing food from home (as we were) grab a pie and bring it back to the campground for dinner!
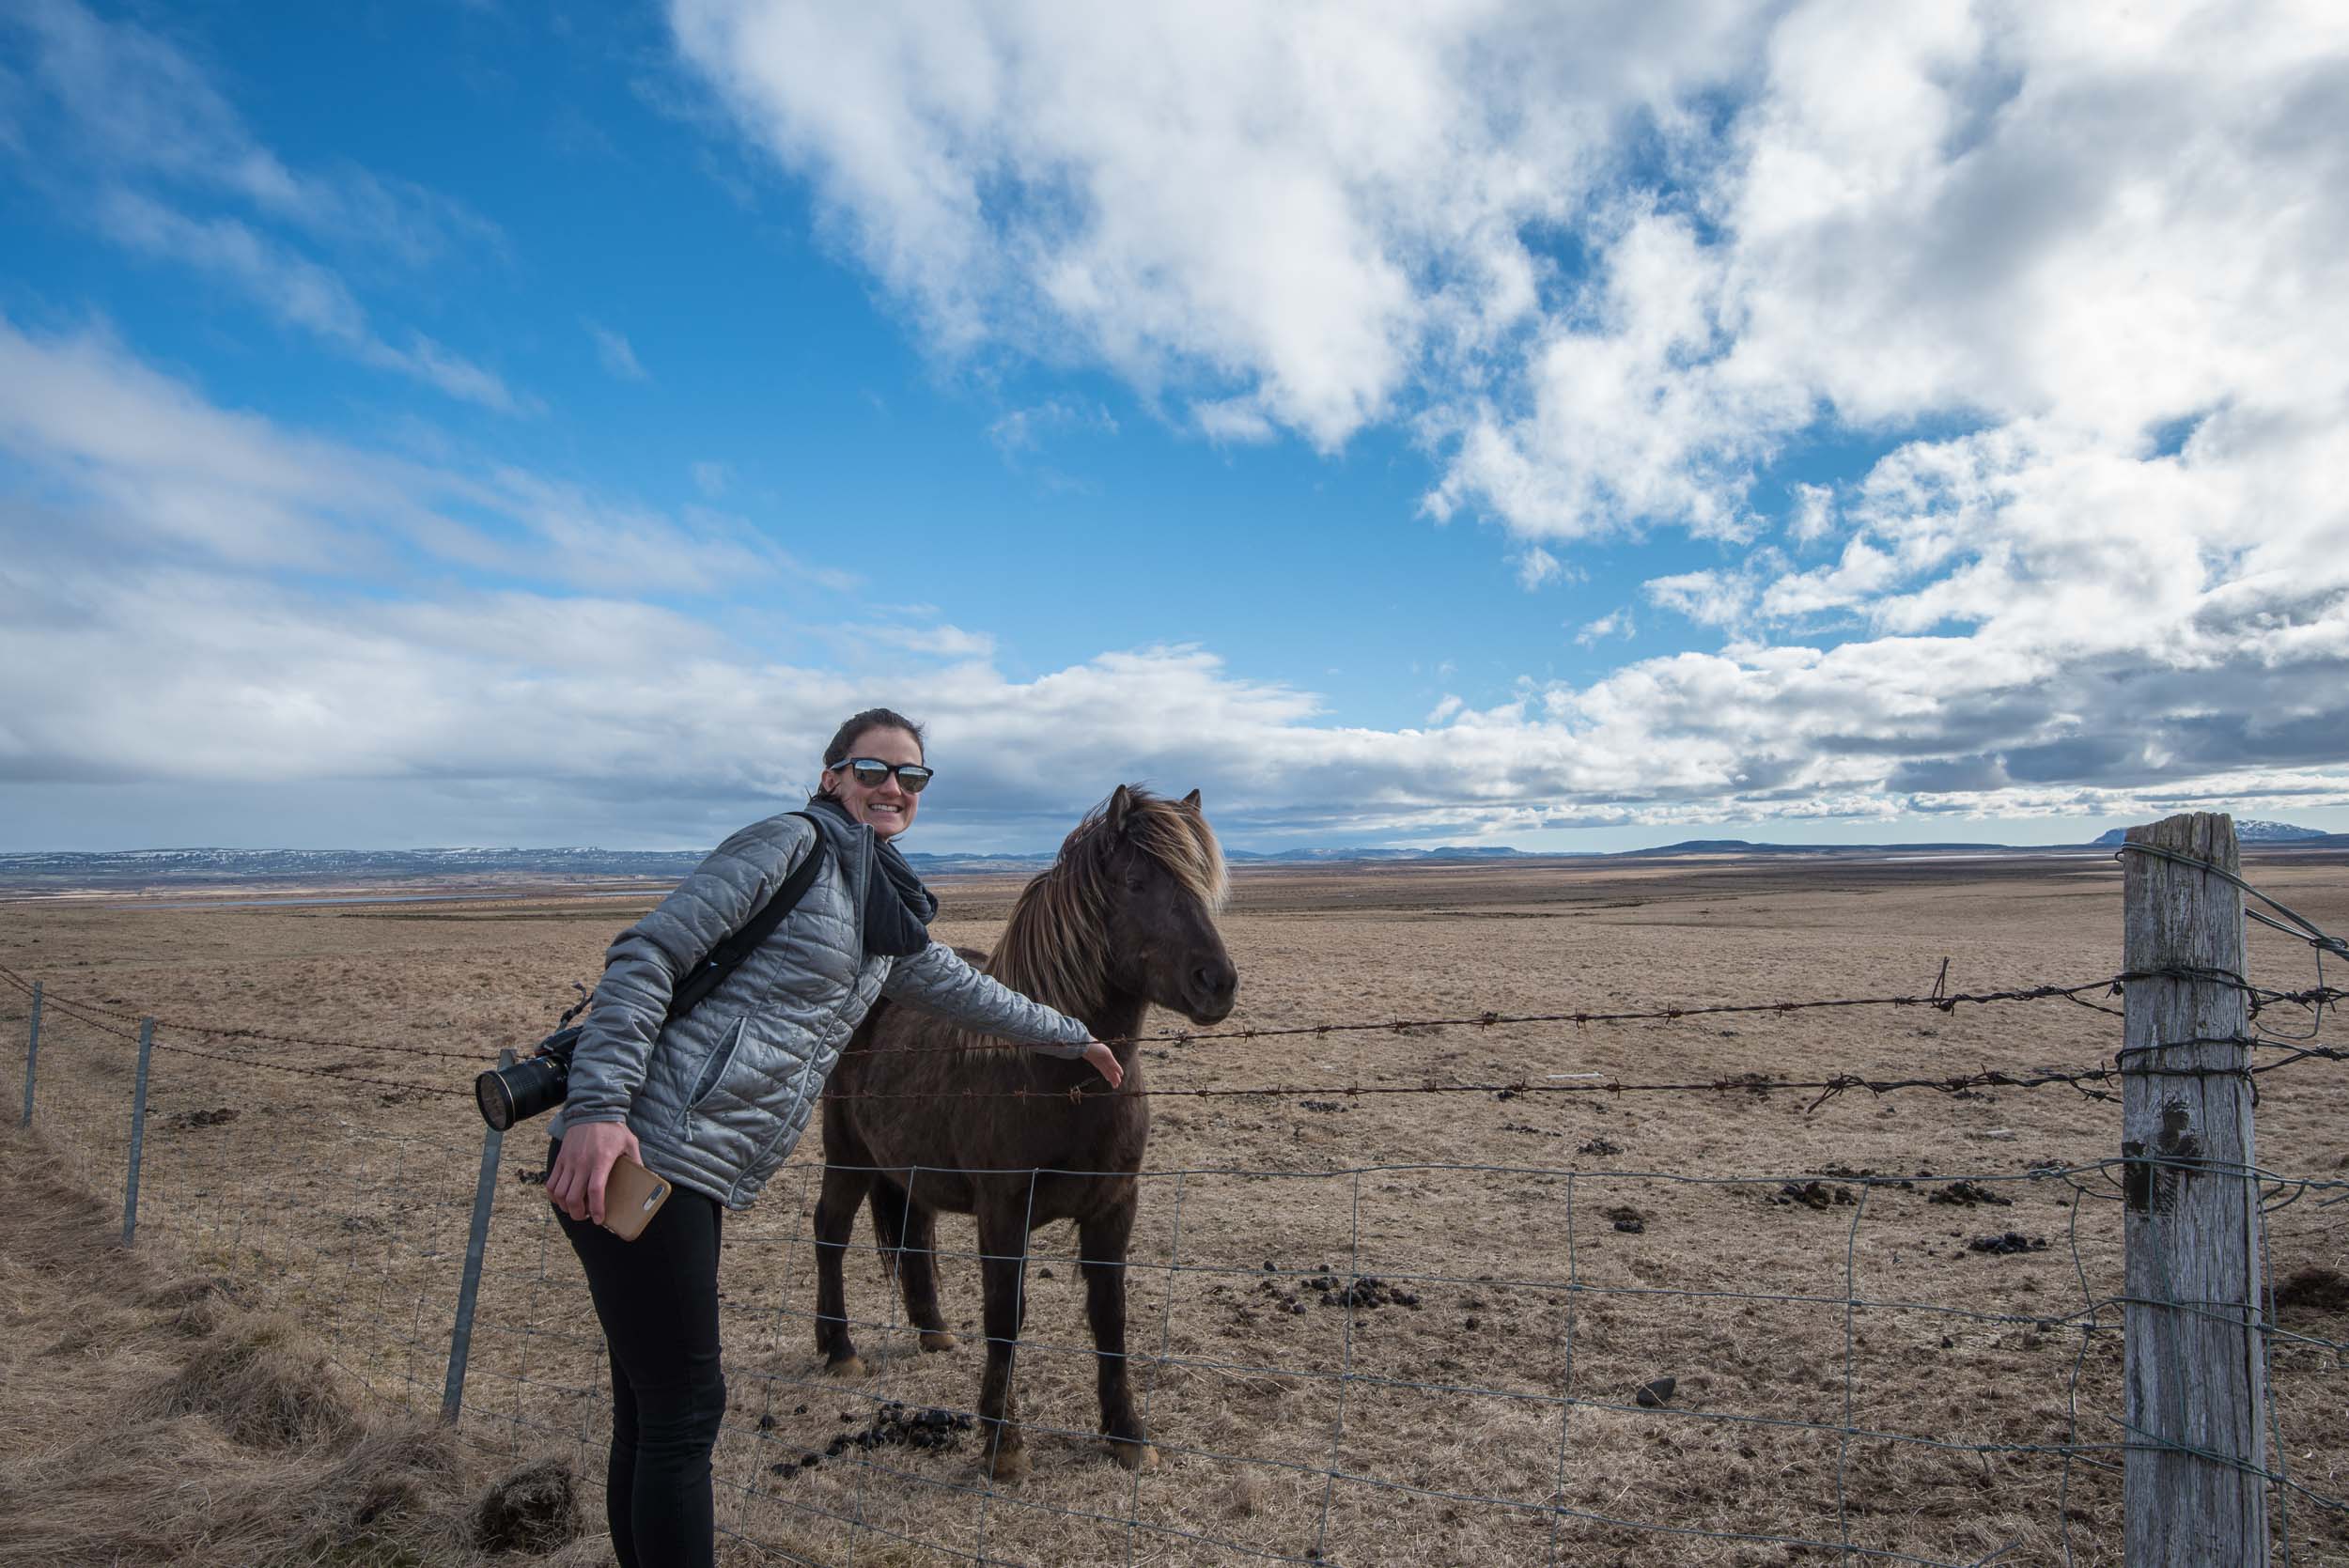
Don't forget to stop and see the ponies!
Day 3 – Waterfalls, Vik and a Plane Wreck
If you are missing a nice espresso drink, wakeup and drive 20 minutes back to Selfoss to stop at Bókakaffið for your morning fix. This super cute café has tons of books, seating and amazing coffee. We started a day here and caught up on internet things before taking off on another busy exploration.
Get back on Route 1 and start your exploring at Seljalandsfoss. Before you arrive though, pull off and take in the vast array of black sand lagoons formed by the glacial runoff. It is quite a sight to behold. Then, head to the falls themselves for some amazing photos. If you are feeling like getting wet, you can even walk behind the falls for unique perspectives.

Black sand lagoons and Sejalandsfoss
Back on the road, head towards Vik. Yes, you will pass a few things along the way such as Skogafoss and our plane wreck, but do not fear, you are coming back! Drive to the top of the town and take in those views! Insane Icelandic coast, crazy rock structures and a beautiful town below. It is a gorgeous spot for lunch.

Views of Vik
Start backtracking and stop to park at the Sólheimasandur Plane Crash site. These days you can google the crash and it should get you to the parking area. It is located on a remote stretch of road between Vik and Skogafoss. You should see some cars parked.
The Sólheimasandur Plane Crash is the left-behind wreckage from a November 24, 1973 crash of a Navy DC-3 aircraft. Thankfully the entire crew survived and the main fuselage was left behind. The crash site is 4 km one-way from the parking area but the path is flat and well-marked. Bring everything you will need because you will be gone for a few hours and if you are going near dark, make sure you have flashlights!

Sólheimasandur Plane Crash
Once finished at the site head back to Skogafoss and camp for the night. There is a parking area right under the falls where you can park the van for the evening. If you are lucky the northern lights will be out and will be insane as this stretch of Iceland’s coast has almost no light pollution. Or, if you are super adventurous take them in back at the plane wreck…
Bonus: if you have time stop by Seljavallalaug, a hot spring that sits on the side of a mountain. You can find more info here.
Day 4 – Glacier Beach & Djúpivogur
Get up early and take in Skogafoss in the early morning before the crowds have arrived. Not only will you get some amazing light, but you will also be able to get right up to the falls for pictures without any people in them!

All alone at Skogafoss
After you are ready to roll, head straight for Jökulsárlón Glacial Lagoon and Iceland's Diamond Beach. Here, you are in for a treat. Park the van and start hiking around the lagoon. It will be full of floating chunks of glacier that will eventually make their way into the ocean. If you listen closely, you will be able to hear them running into one another. Also, if you are real lucky, you will see some seals swimming in the lagoon as well.

Jökulsárlón Glacial Lagoon
Cross the street and walk along Diamond Beach, which is a black sand beach covered in shards of glacial ice. It is awesome! Head back to the van for some lunch with a view of the beach and then continue north to the tiny town of Djúpivogur.

Diamond Beach
Djúpivogur is a cute fishing town with a population of 450 in the northern part of Iceland. If you are in need of some refuge from the van, stay at the Hotel Framtid. If you are loving the Camper Van, stay at the town’s amazing campsite, also run by Hotel Framtid (either way you need to go to the hotel's front desk). We did the campsite and were greeted by an incredibly friendly hotel employee who showed us around the site including the amazing kitchen, showers and common area. He also pointed us to a hidden geothermal hot tub 5 minutes down the road. We will not share the secret here since it is meant for locals, but if you find yourself at the hotel definitely ask ;)

Hidden Tub
Hopefully, you can enjoy the hot tub and enjoy a nice hot meal before retiring for the night. You will want the rest because tomorrow is a long driving day full of more sights!
Day 5 – Fjords, (optional waterfall), Myvatn & Akureyri
Get up early and continue further north along Ring Road. This stretch of road is easily the most uninhabited and will take you further along Iceland’s dramatic Eatsern Fjords and eventually through deep mountain passes. For us, we hit a lot of snow up here so the drive was a bit treacherous. However, it was gorgeous and crazy to think we were just in a green valley a few hours ago!

Into those mountains
Assuming you got through the mountains OK, take a quick detour on route 864 and check out Dettifoss. This is not only Iceland's largest waterfall, but it also said to be Europe's most powerful! You will drive ~20 minutes off route 1 and eventually hit the parking area where you will need to hike another ~10 minutes. When we were there they were building new viewing decks, which will be wonderful for viewing this giant.

Dettifoss is a beast
Have lunch in the parking area before eventually arriving in the Myvatn area sometime in the afternoon. Here, you will be treated to an insane geothermal area full of steam vents, mud pits and one of our favorite hot springs (The Myvatn Nature Baths). The baths are just like the Blue Lagoon, but way less expensive and way less crowded: win win.

Kirby at Myvatn

The "other" Blue Lagoon
For the evening there are a lot of campsites around Myvatn, but if you are ready for some civilization (as we were) head to Akureyri for the evening. If you play your cards right you can even grab an expensive drink and have dinner in a restaurant. If in Akureyri spend the night at the Hamrar campsite, which is lovely.
Day 6 – Akureyri to Reykjavik
Grab some coffee in town and then start heading back towards Reykajavic. Assuming you don’t stop, the drive should take you about 4.5 hours. If this is your last day, you can easily be in Iceland’s capital by lunch with plenty of time to explore. If you aren’t in a rush, take in the drive and arrive sometime in the afternoon. This is preferable because on your way back you will get views like this (and it is hard not to stop):

Snowy valley somewhere in Northern Iceland
Camp at the Reykjavic Campsite and hostel. Here you will find a great spot to park the van with lots of amenities such as laundry, wifi and a store. Or, if you are tired of the van you will find plenty of hotel options as well as an abundant supply of Airbnb’s.
Day 7 - Reykjavic
If you have a full day in Reykjavic, head right to Reykjavic Roasters to start your day. This shop has incredible coffee and a great atmosphere where you will likely meet fellow travelers and be asked to put on a vinyl. If you are in need of more indulgence head just down the street to Brauð & Co for a cinnamon bun (they are insane)!
While in Reykjavic hit the Hallgrimskirkja for photos, the amazing shopping street of Laugavegur and of course catch the sunset at the Viking Sculpture down by the water. Furthermore, there are tons of museums, galleries and boutiques to satisfy anyone. The best part is the Reykjavic is super compact, so it's totally walkable! You can conquer this city in a half a day if needed.

Sunset in Reykjavik
If you are looking for some authentic Icelandic cuisine, now is your chance. Head to any number of amazing restaurants here and you can likely sample local fare. We actually went for Tapas Barinn so we could share a bunch of small plates including whale, puffin and a plethora of local fishes, etc.
Day 8 - Heading Home :(
Assuming you made it this far, it is sadly time to head home. Drive to the Happy Campers HQ to return your van, donate some supplies to the pantry and get driven back to the airport. Now, take a deep breath and reflect on what an amazing experience you just had!
We sincerely hope you enjoyed this guide. It is the first we have ever done and if you have any feedback, please comment below. We would love to hear from you! If you want to see more guides like this, let us know either below or by contacting us here! Thanks for reading!

How to turn your car into a camper!
We will walk you through exactly how we turned our SUV into a full-on camper to maximize storage and give us a permanent place to sleep when needed.
When we decided to hit the open road for 2-3 months we were trying to figure out how we would sleep. Visiting our national parks is certainly conducive for camping, but everyone we talked to said the same thing: you are going to want to be able to sleep in your car if you need to. We loved car camping in Iceland so wanted a solution where we could sleep in our 2015 Jeep Grand Cherokee.
Originally, we thought we could put the seats down, store camping gear up top and call it a day. However, after some extensive internet research we decided we wanted to be able to sleep in the car and have all of our gear inside at the same time. The solution: we decided to turn our Jeep into a camper by building a sleeping platform. This was cheap, easy and turned out amazing! Here is how we did it in 12 easy steps, but one could easily do it in less.
Also to note - we had a HUGE advantage thanks to Kirby's Dad who is a builder. This project only took us a few hours thanks to his knowledge and of course, his tools. It may take longer for some, but anyone can do this, we promise!
Tools you will need:
- Measuring Tape
- Pencil
- Hammer
- Drill (optional, screwdriver could work)
- Staple gun (optional)
- Saw (optional)
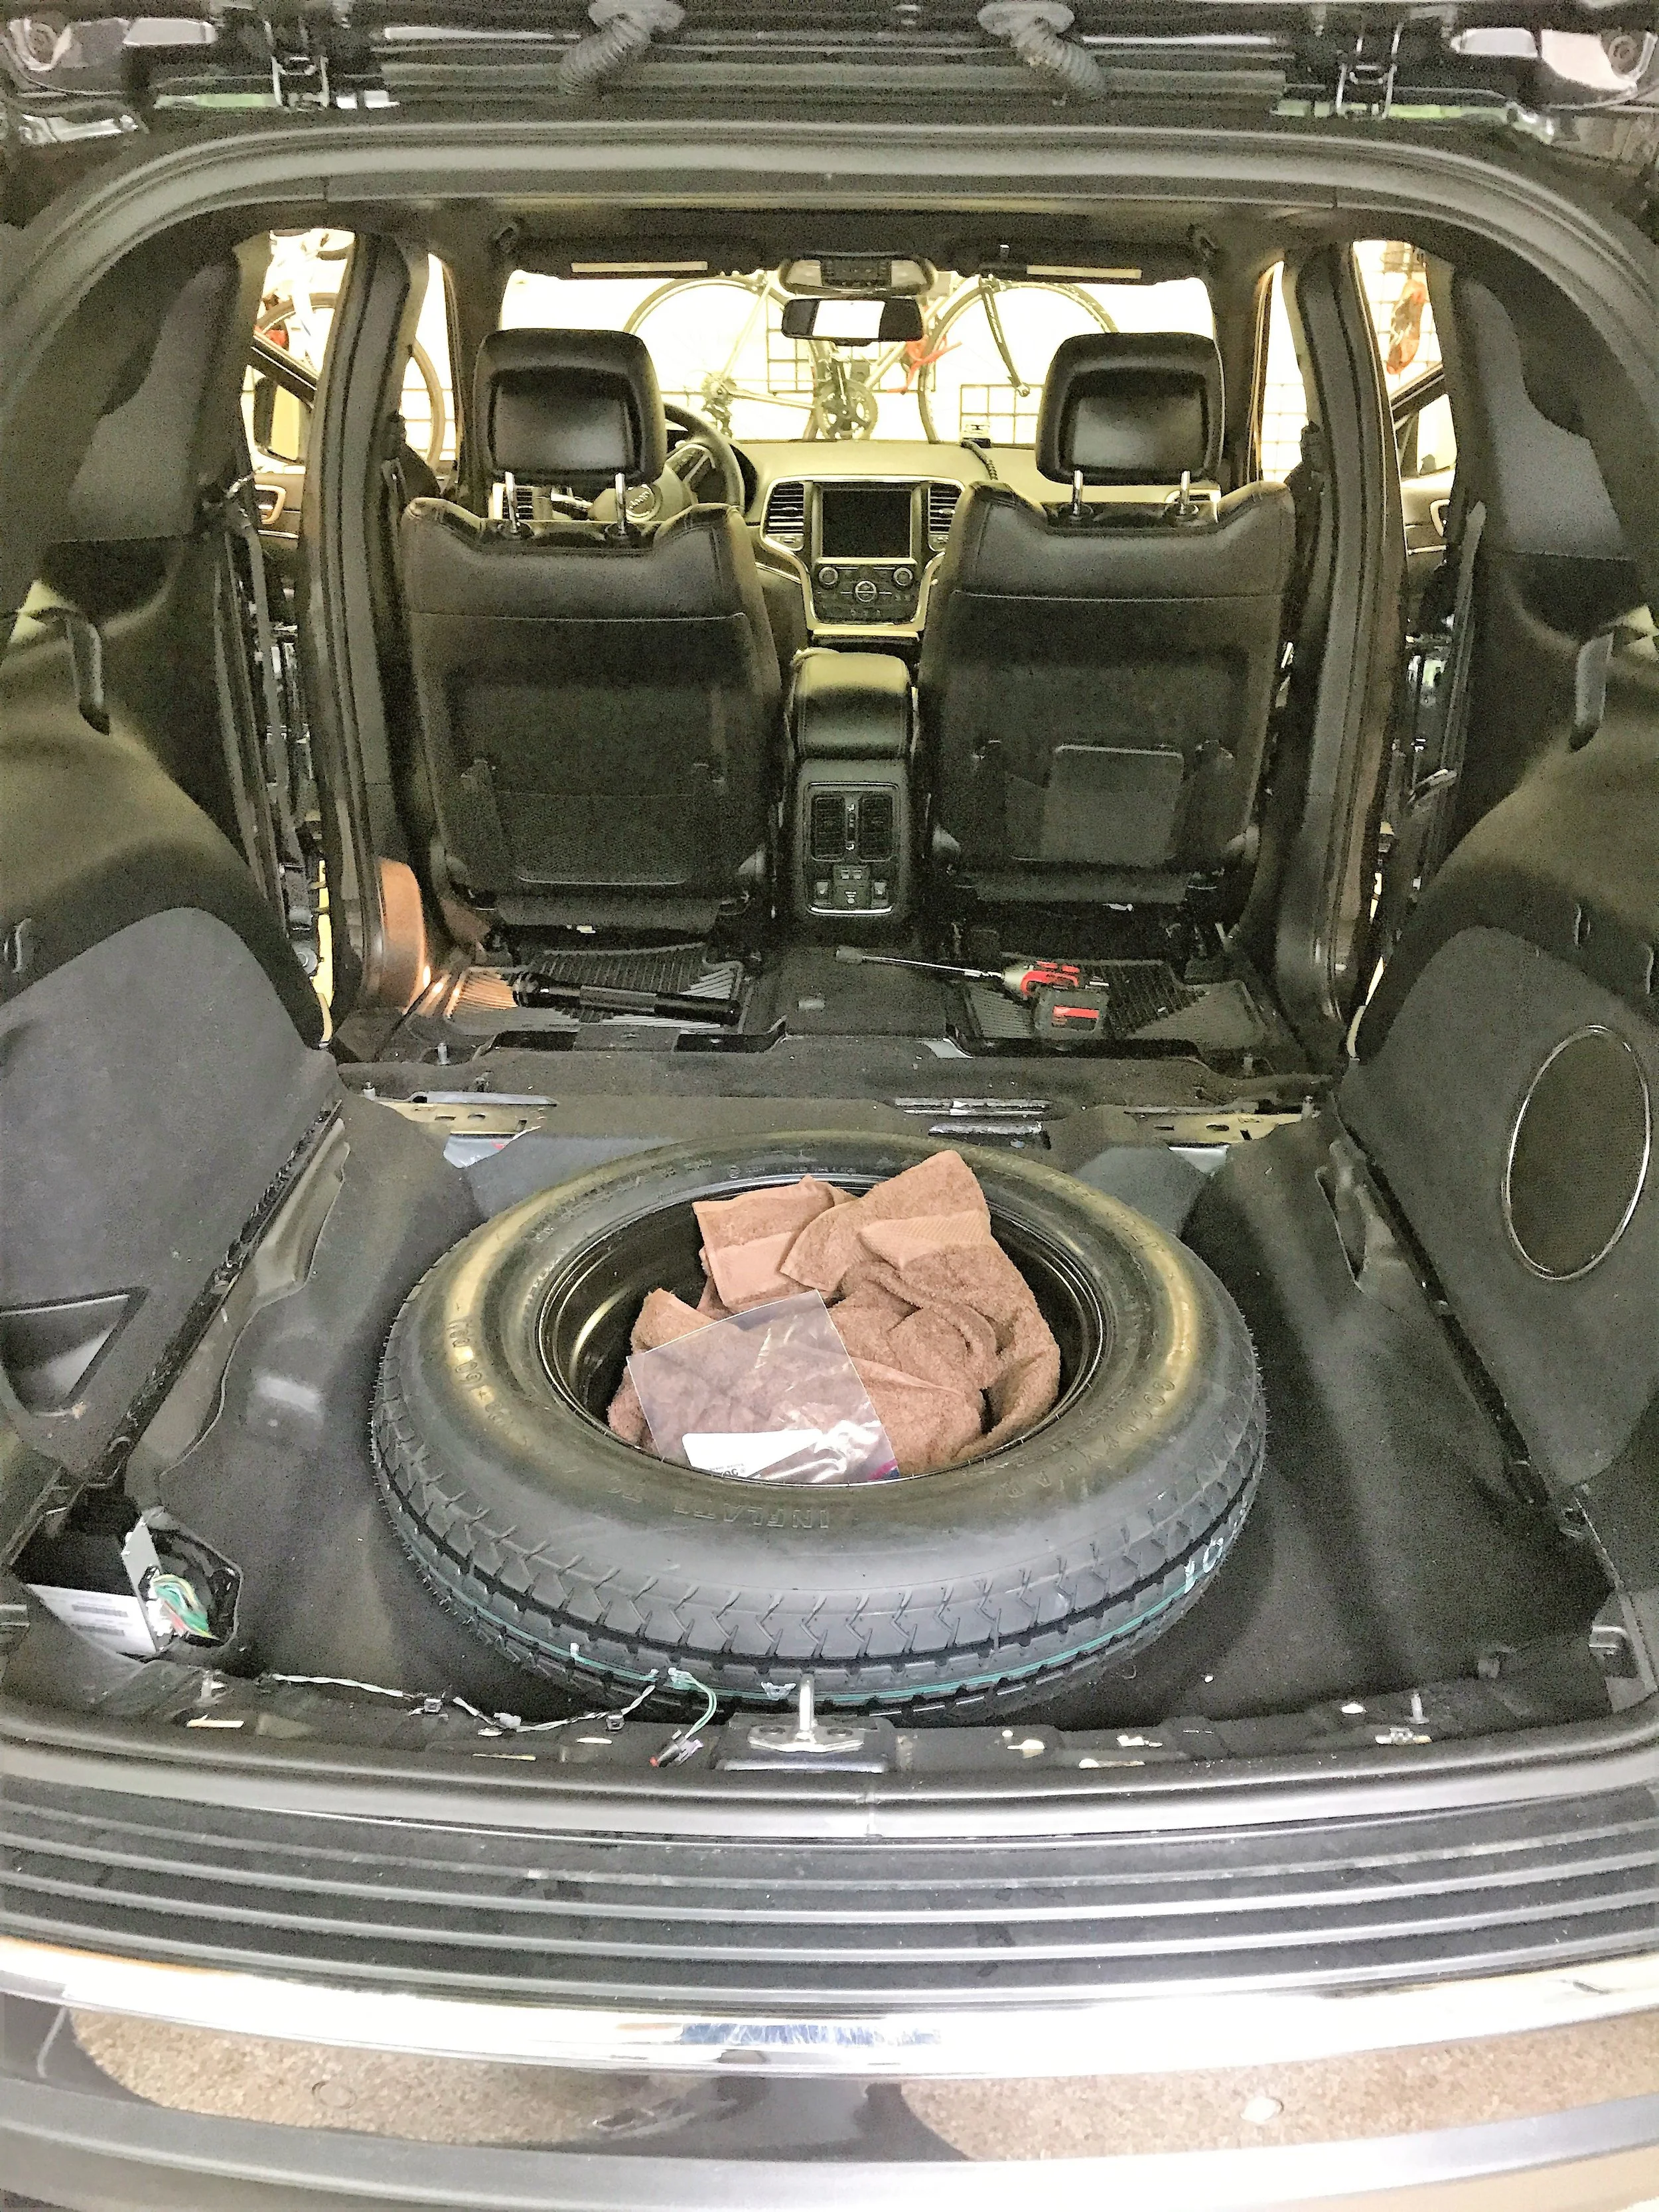
Step 1 (optional) – Remove the rear seats of the car
While we did not need to do this, we ultimately decided to because it gave us so much more storage underneath our would-be sleeping platform. This was probably the hardest part of the entire project and if you have any apprehension or concern you should consult your car dealer and/or a professional. One caveat here: you probably need some power tools, mainly a drill. Those seats are in there good!
If you do decide to do it, make sure to keep all hardware in labeled baggies! This way you can easily put them back when ready.
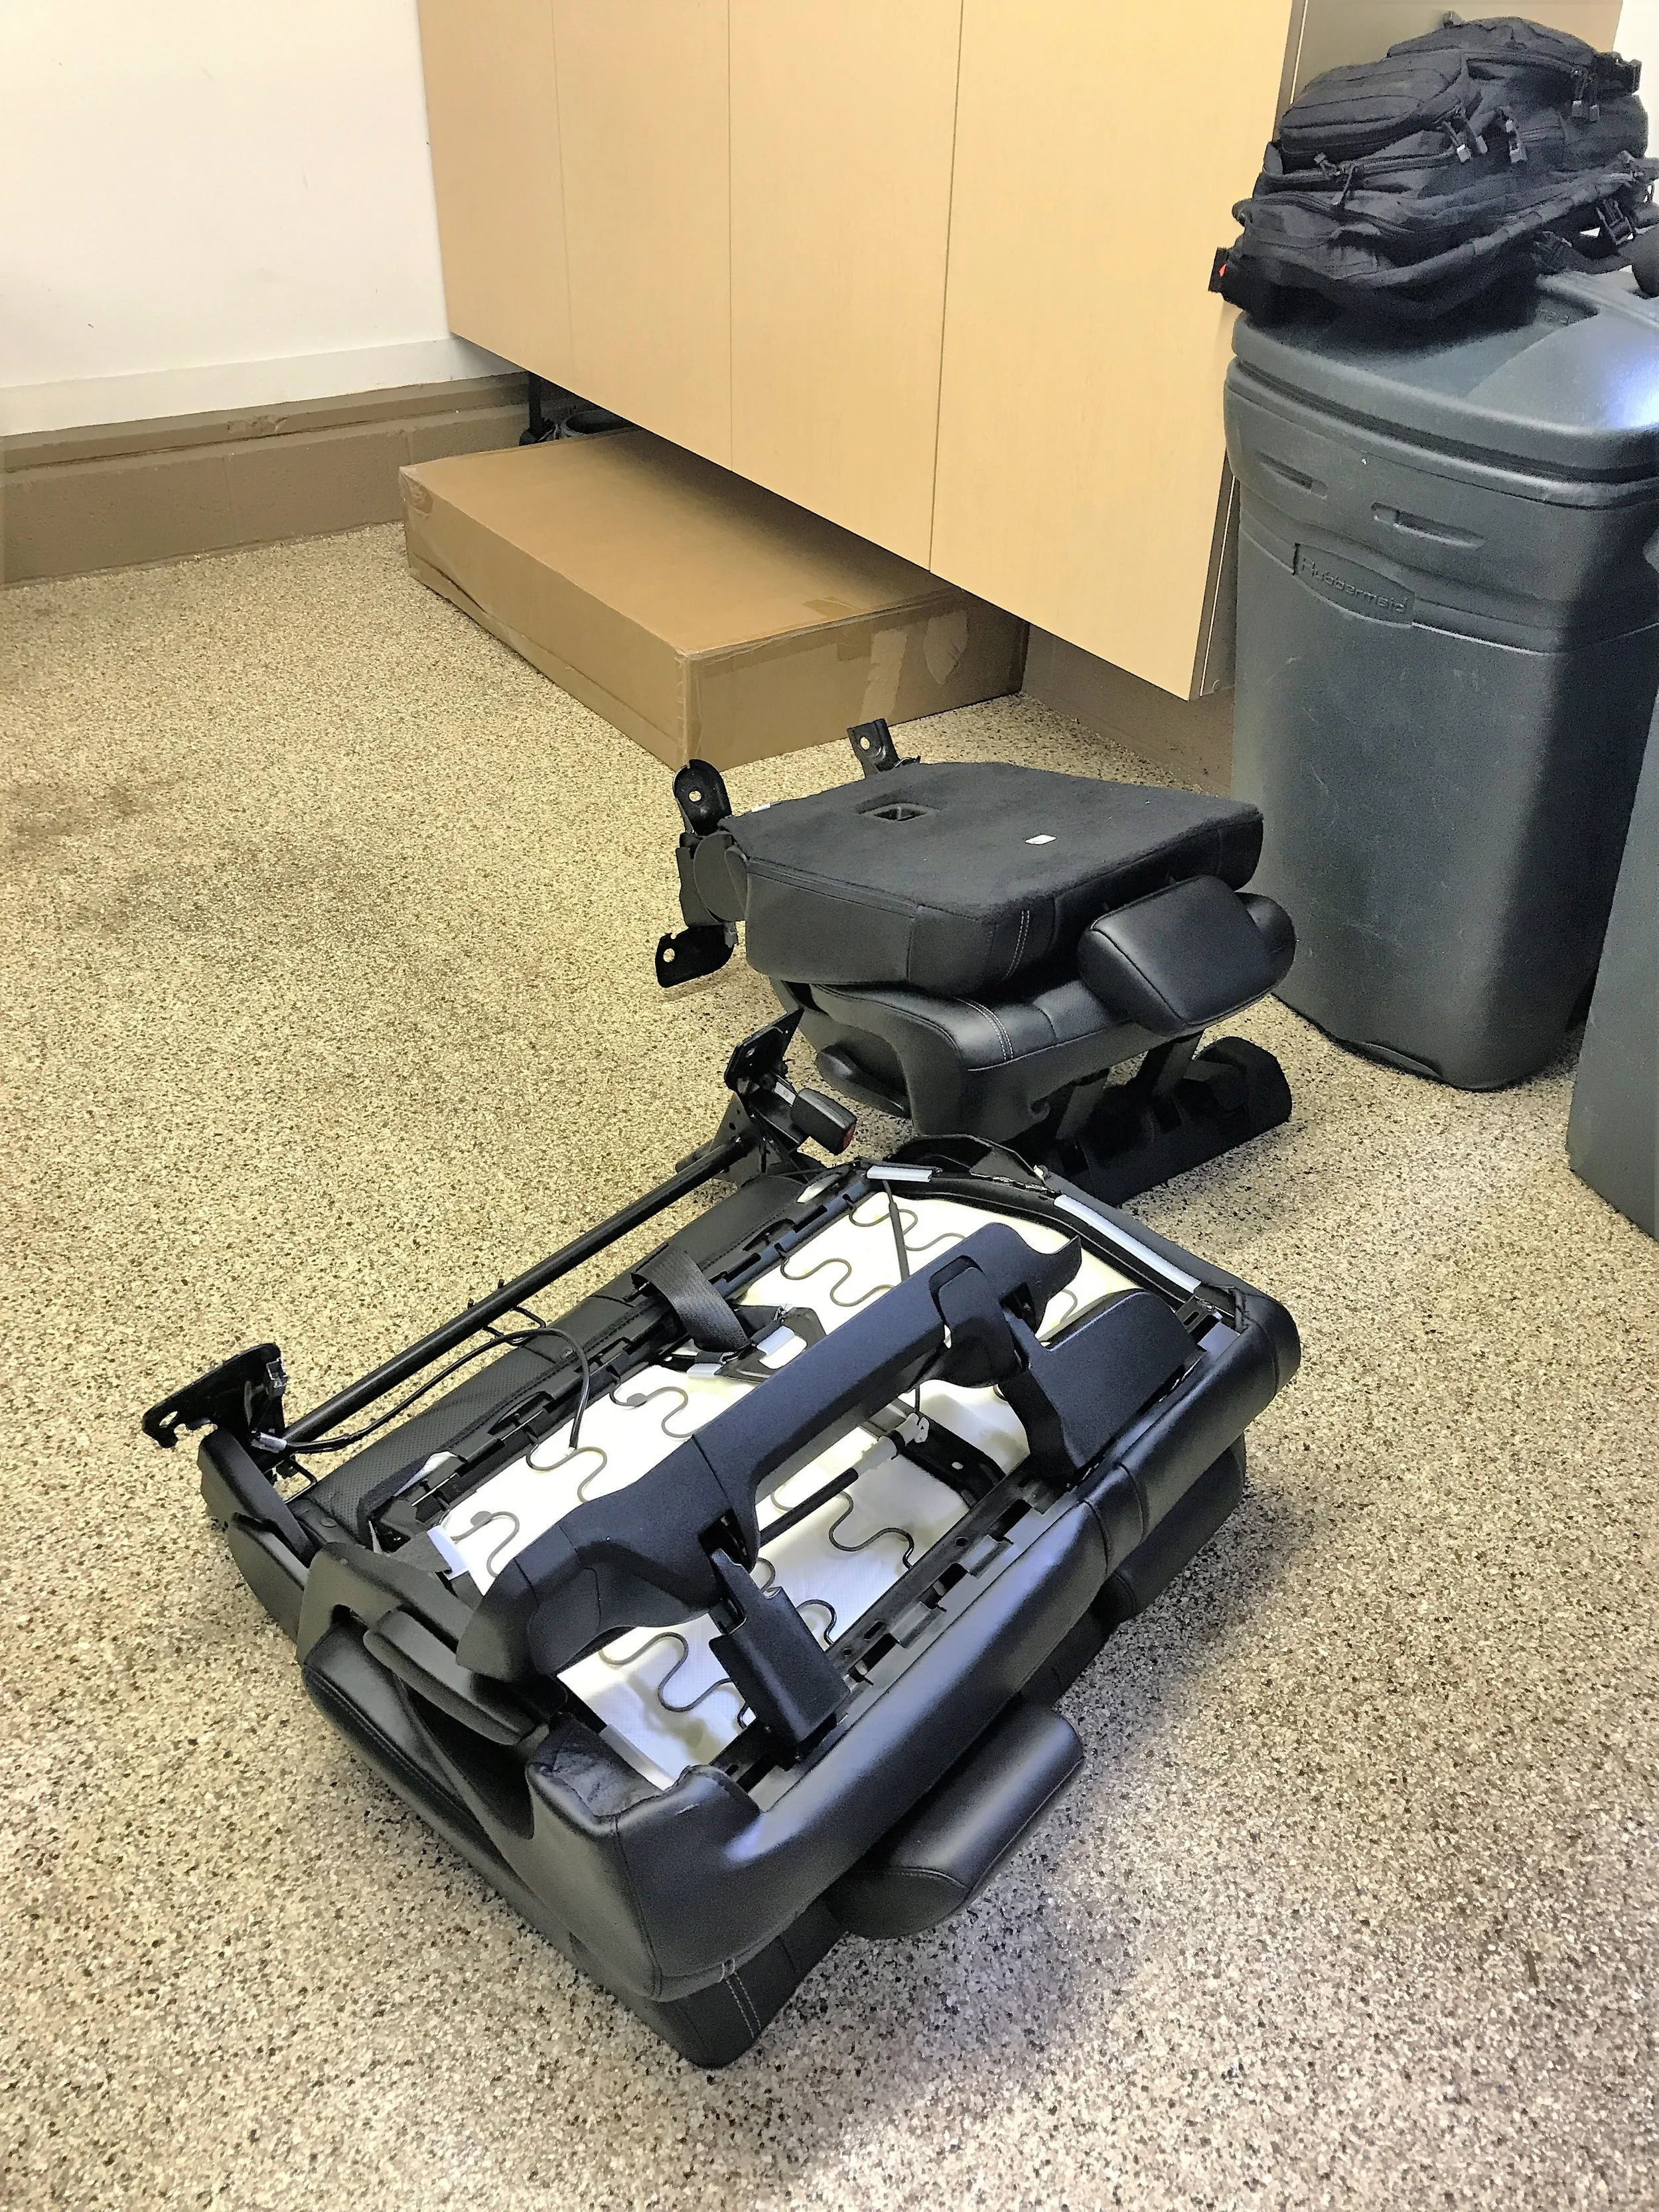
Back Seats Removed
Lots of space to work with...
Step 2 – Design
There are tons of stuff you can do. Just google “sleeping platform in car” and you will see. Some people go insane on these! For us, we just wanted a raised platform to sleep on and also decided to add a hinge system so that we could extend the length of the bed when the front seats of our car were pushed up.
To support it we decided a simple rail system would be best to support the bed. Again, lot of options but this would provide lots of support without a ton of support feet.
Step 3 – Measure for dimensions
We first measured the length and width of our platform and then roughly how long our rails and support feet would need to be so we knew how much wood to buy.
Step 4 Head to Store
We chose Loews because it was the closest and here is what we purchased:
2x4’s for support should be perfect and we decided on a thick piece of maple for the bed because a.) it would be sturdy and b.) has a smooth surface. All in $96 for our project and (surprise surprise) we overspent, but more on that later…
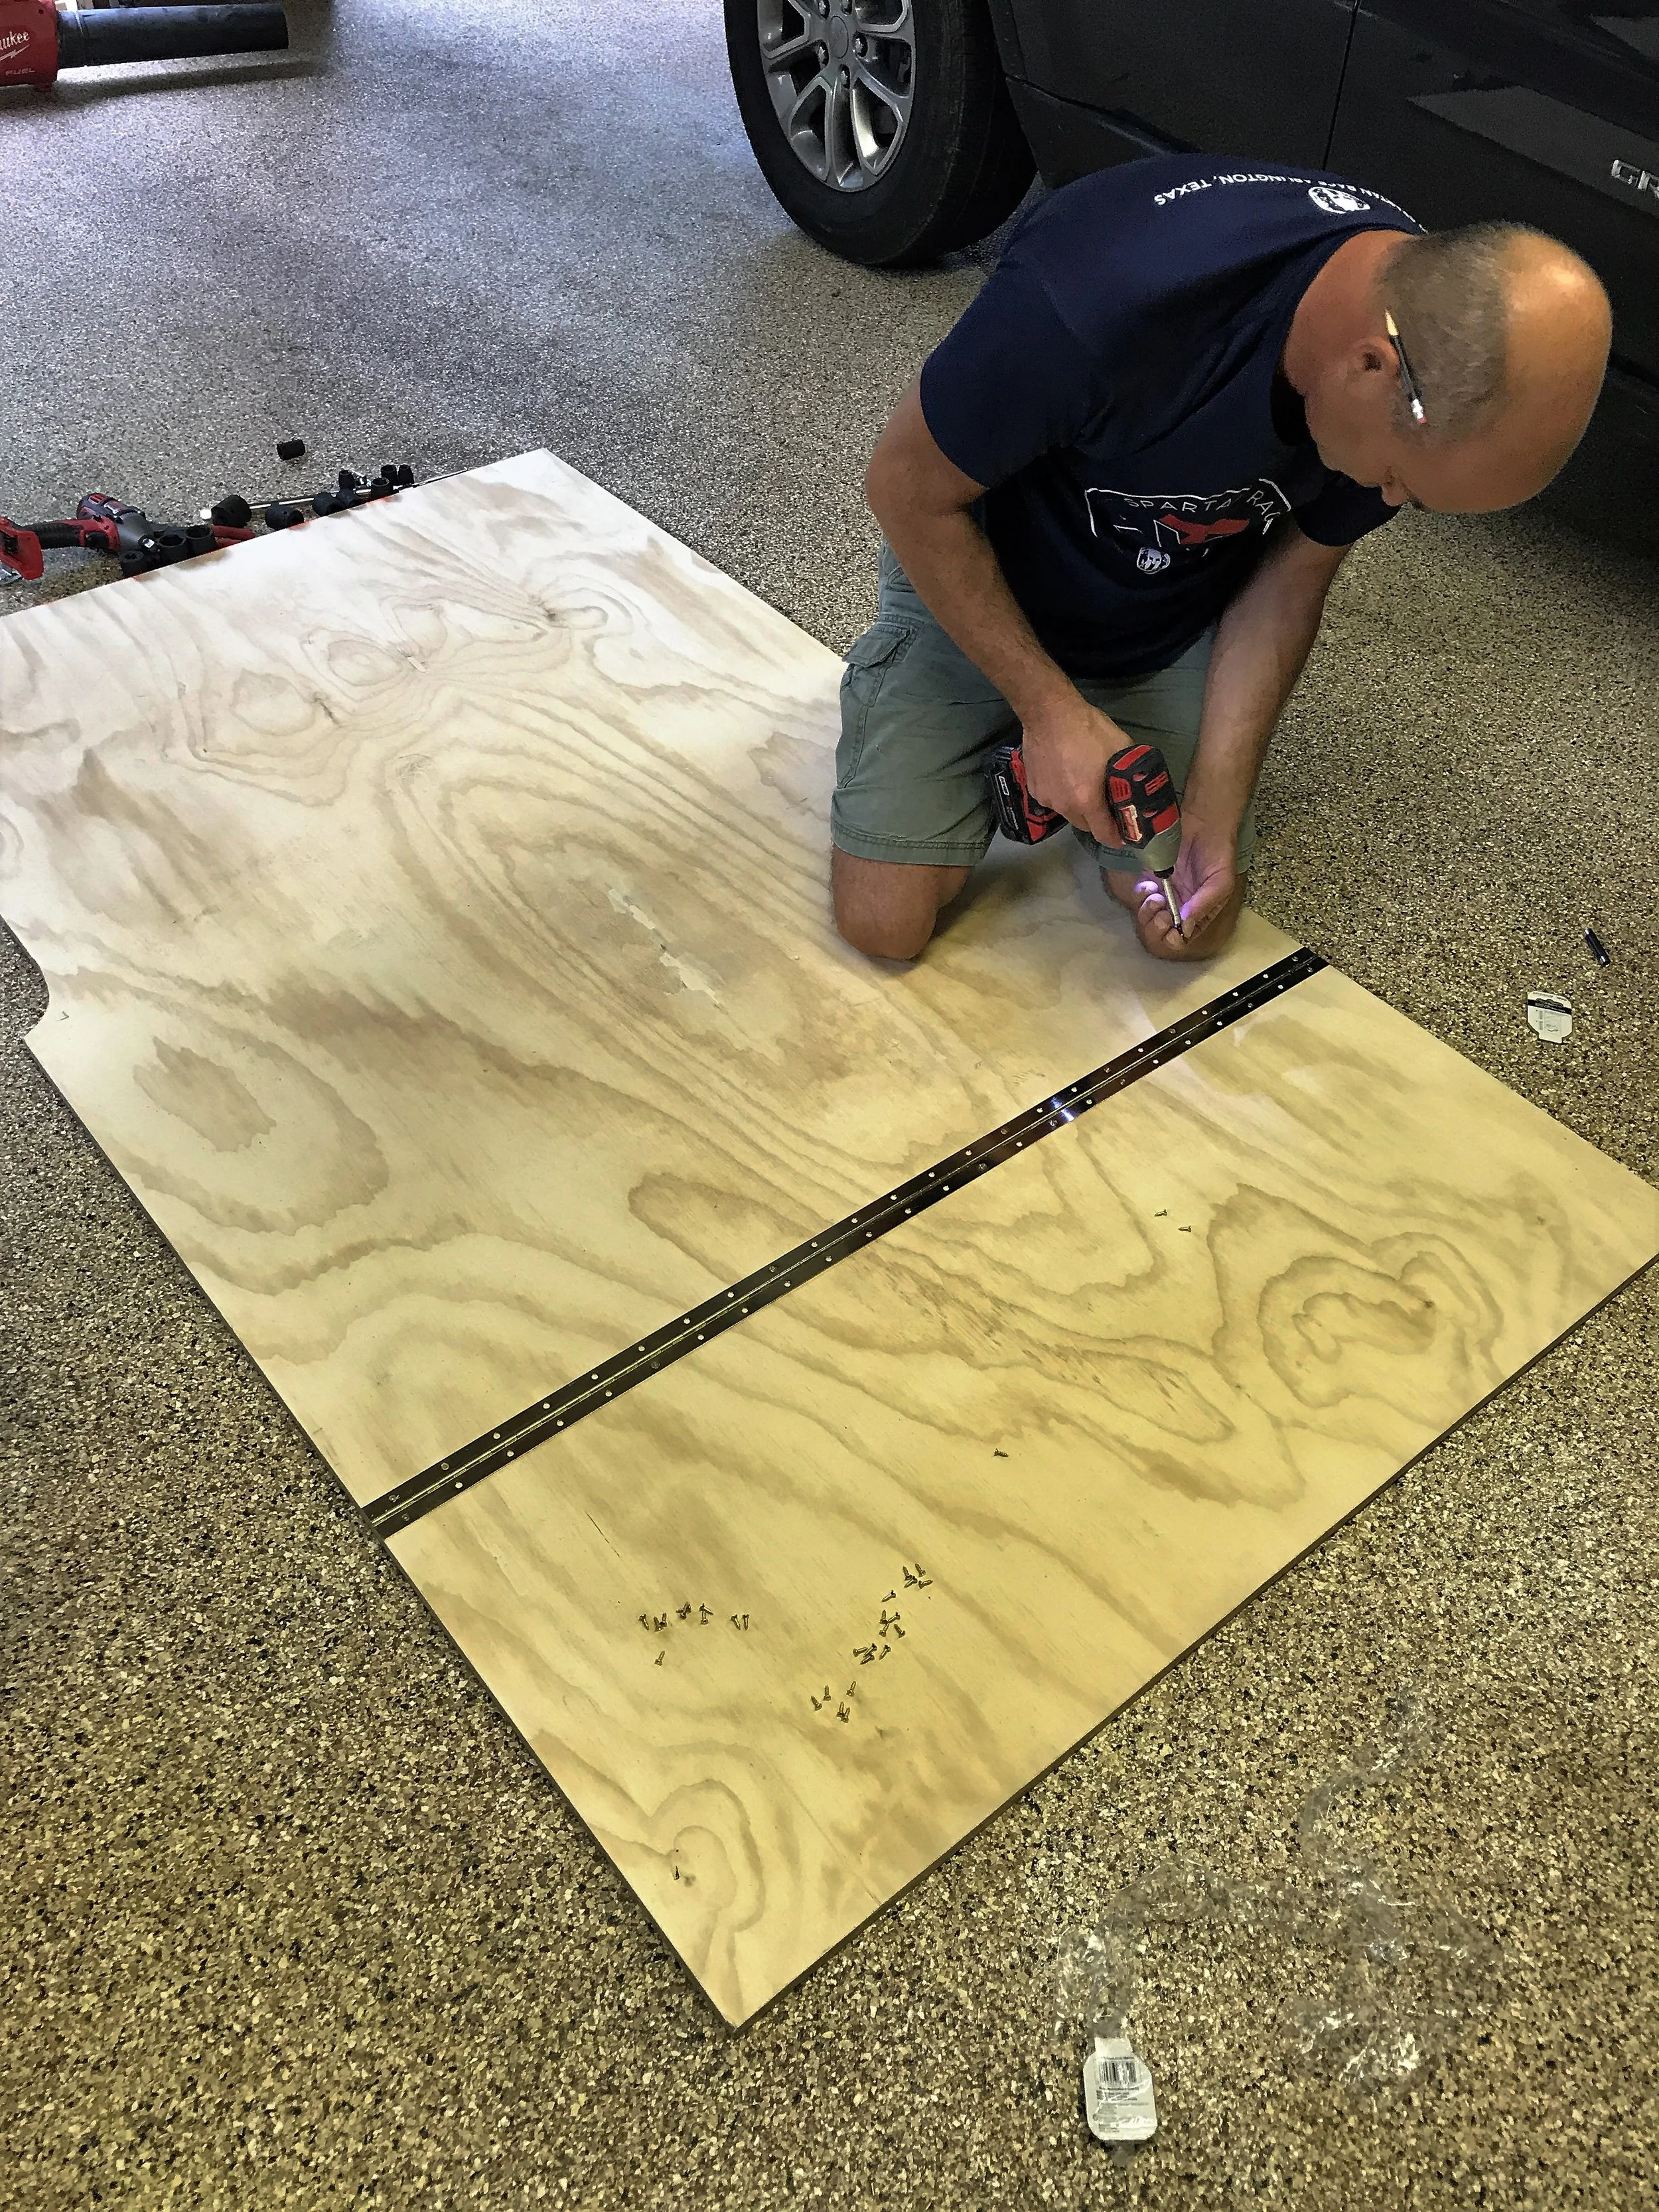
Step 5 – Cut and assemble support system
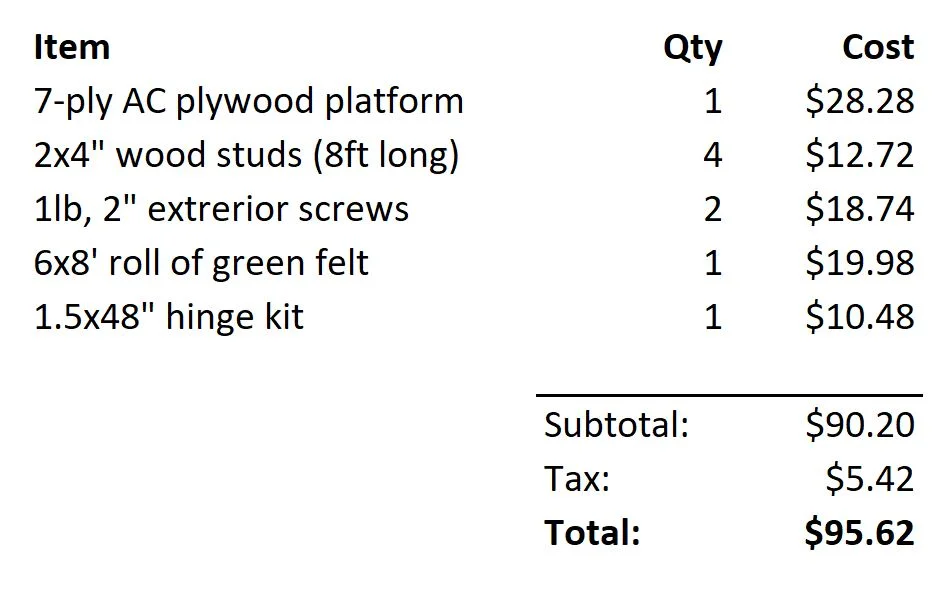
We first cut the rails that would support our platform. Then we cut the rear and front feet per our measurements. We screwed these together using wood screws. Now we had one sturdy support on each side of our car to support our platform
Our rail support system
Step 6 – Cut out platform
Ultimately, we decided to cut our platform to match the contours of our car, most notably the wheel wells in the back. While this is not totally necessary, it does give you some more surface area as well as reduces any gaps where things could fall off the platform.
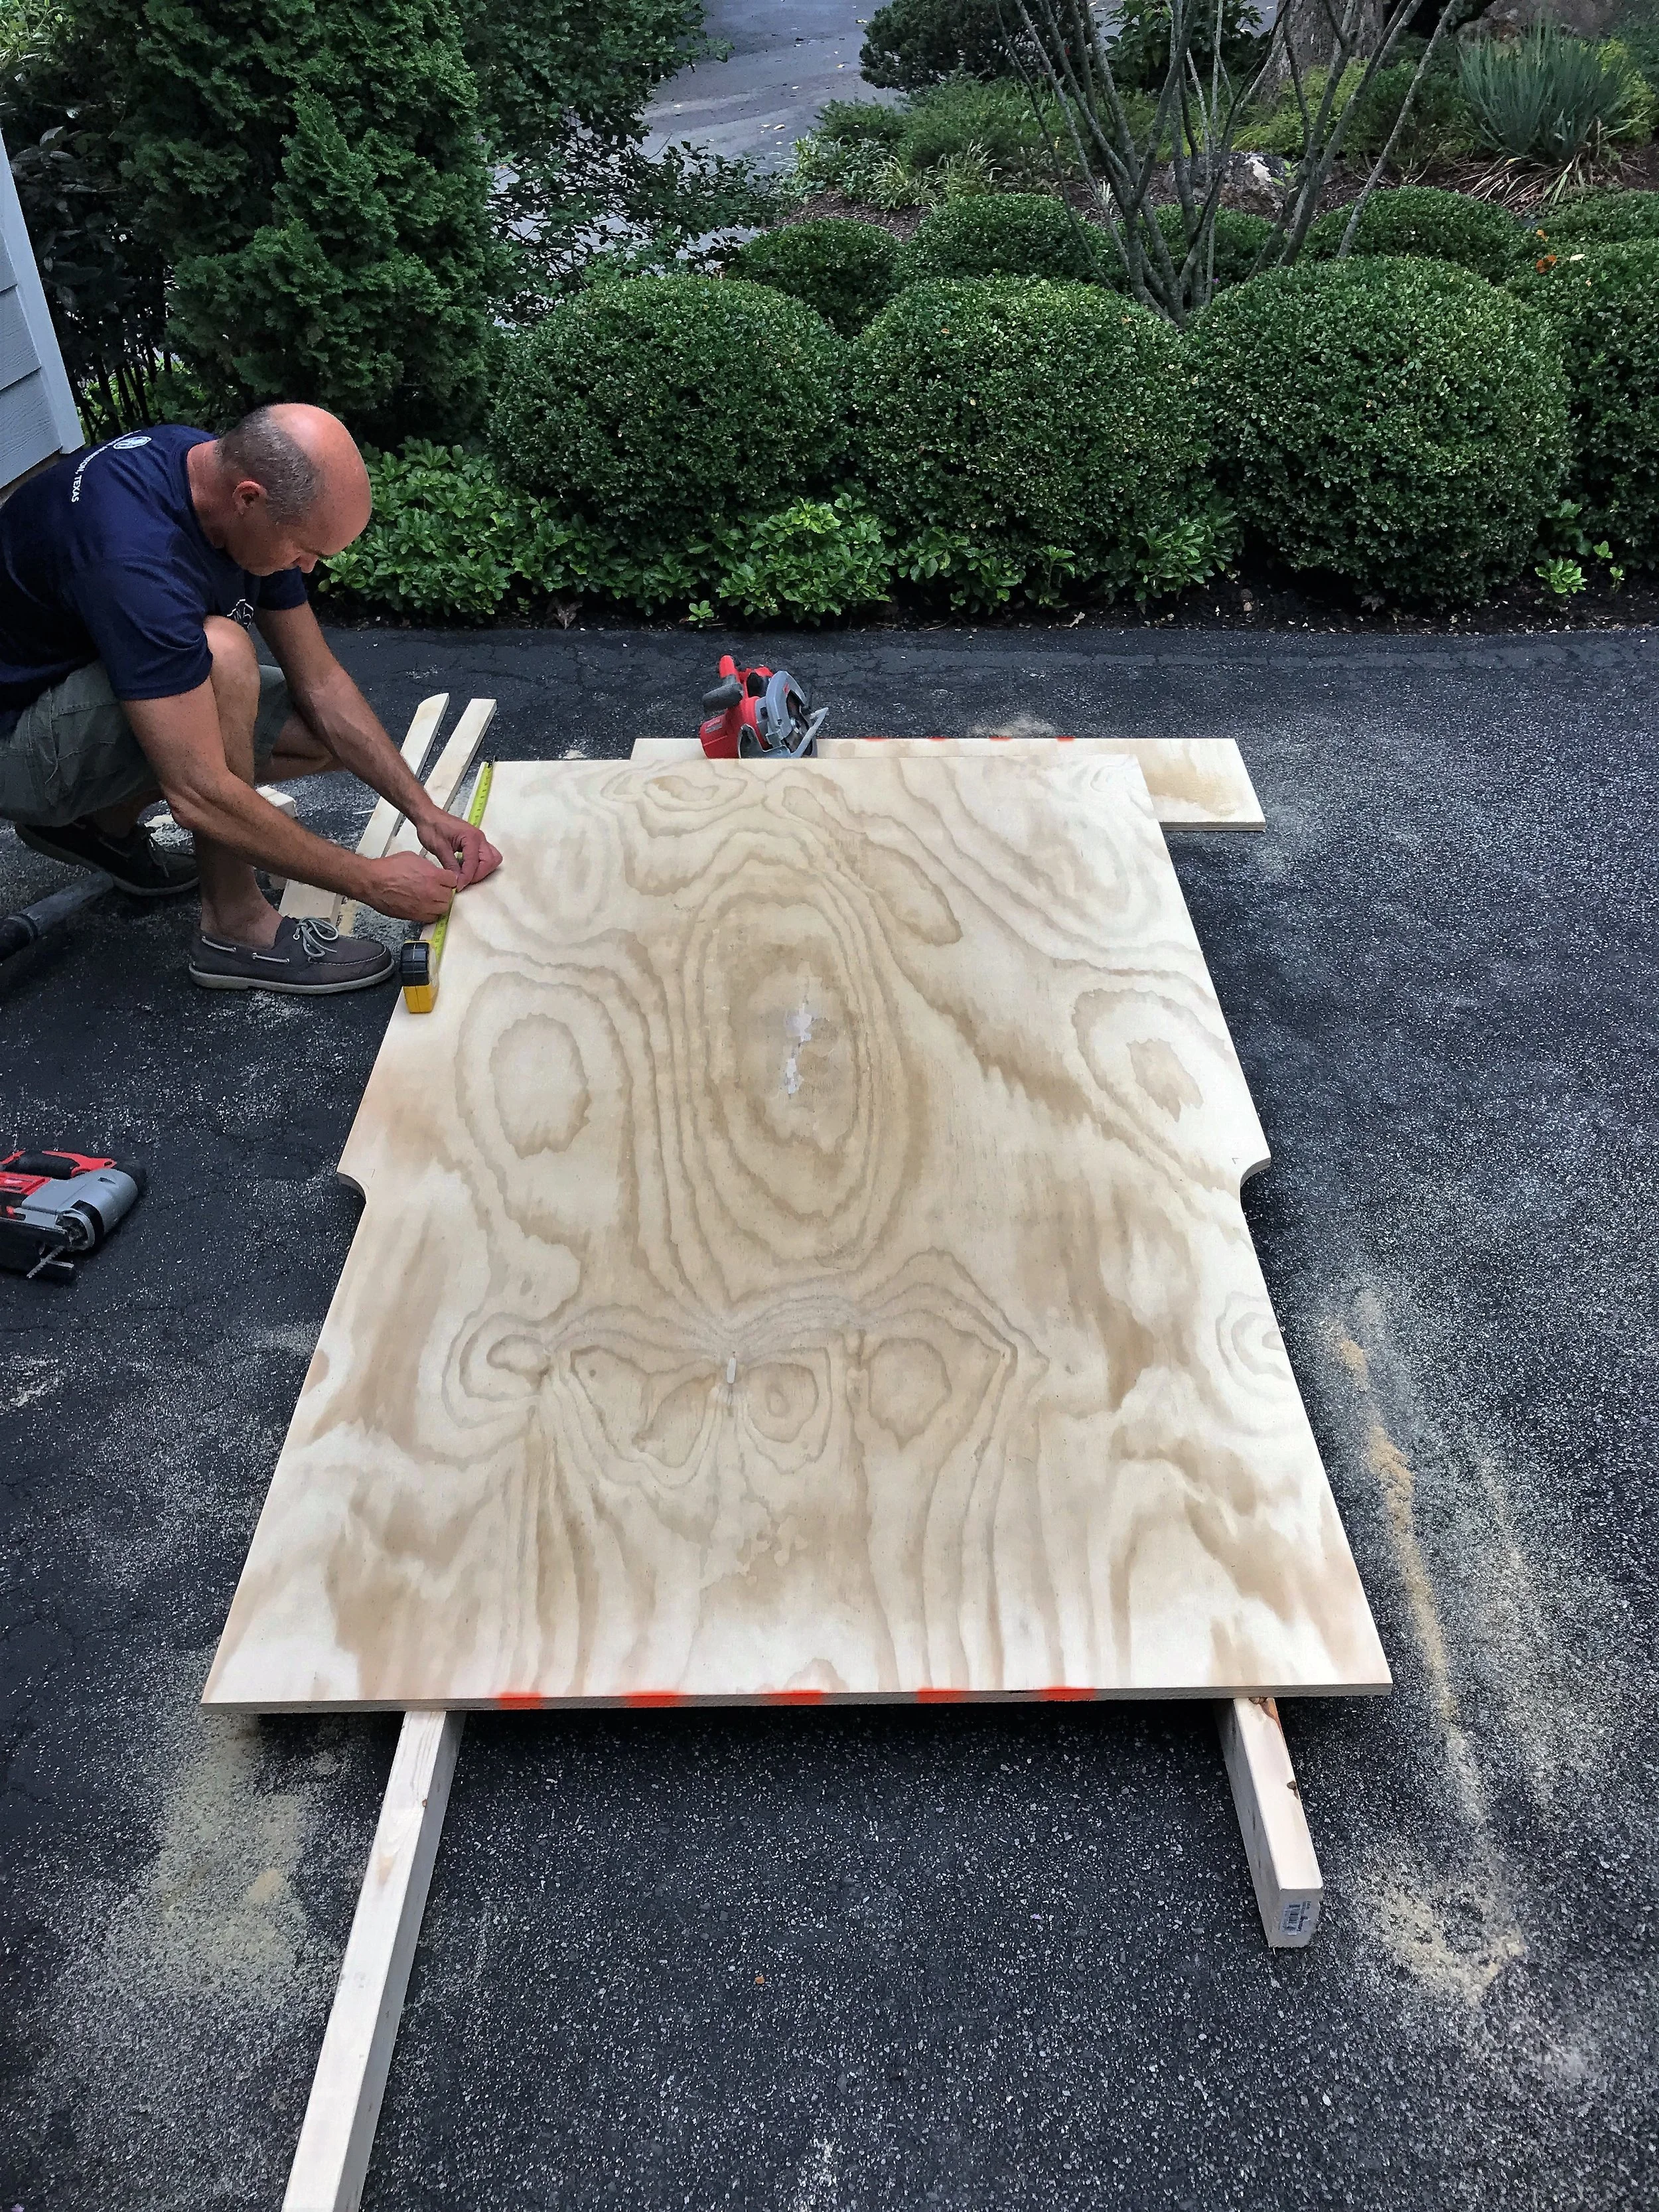
Cutting our platform shape
Step 7 – Lay it out in the car to make sure it all fits
We got the platform in and ensured it fit in our car perfectly
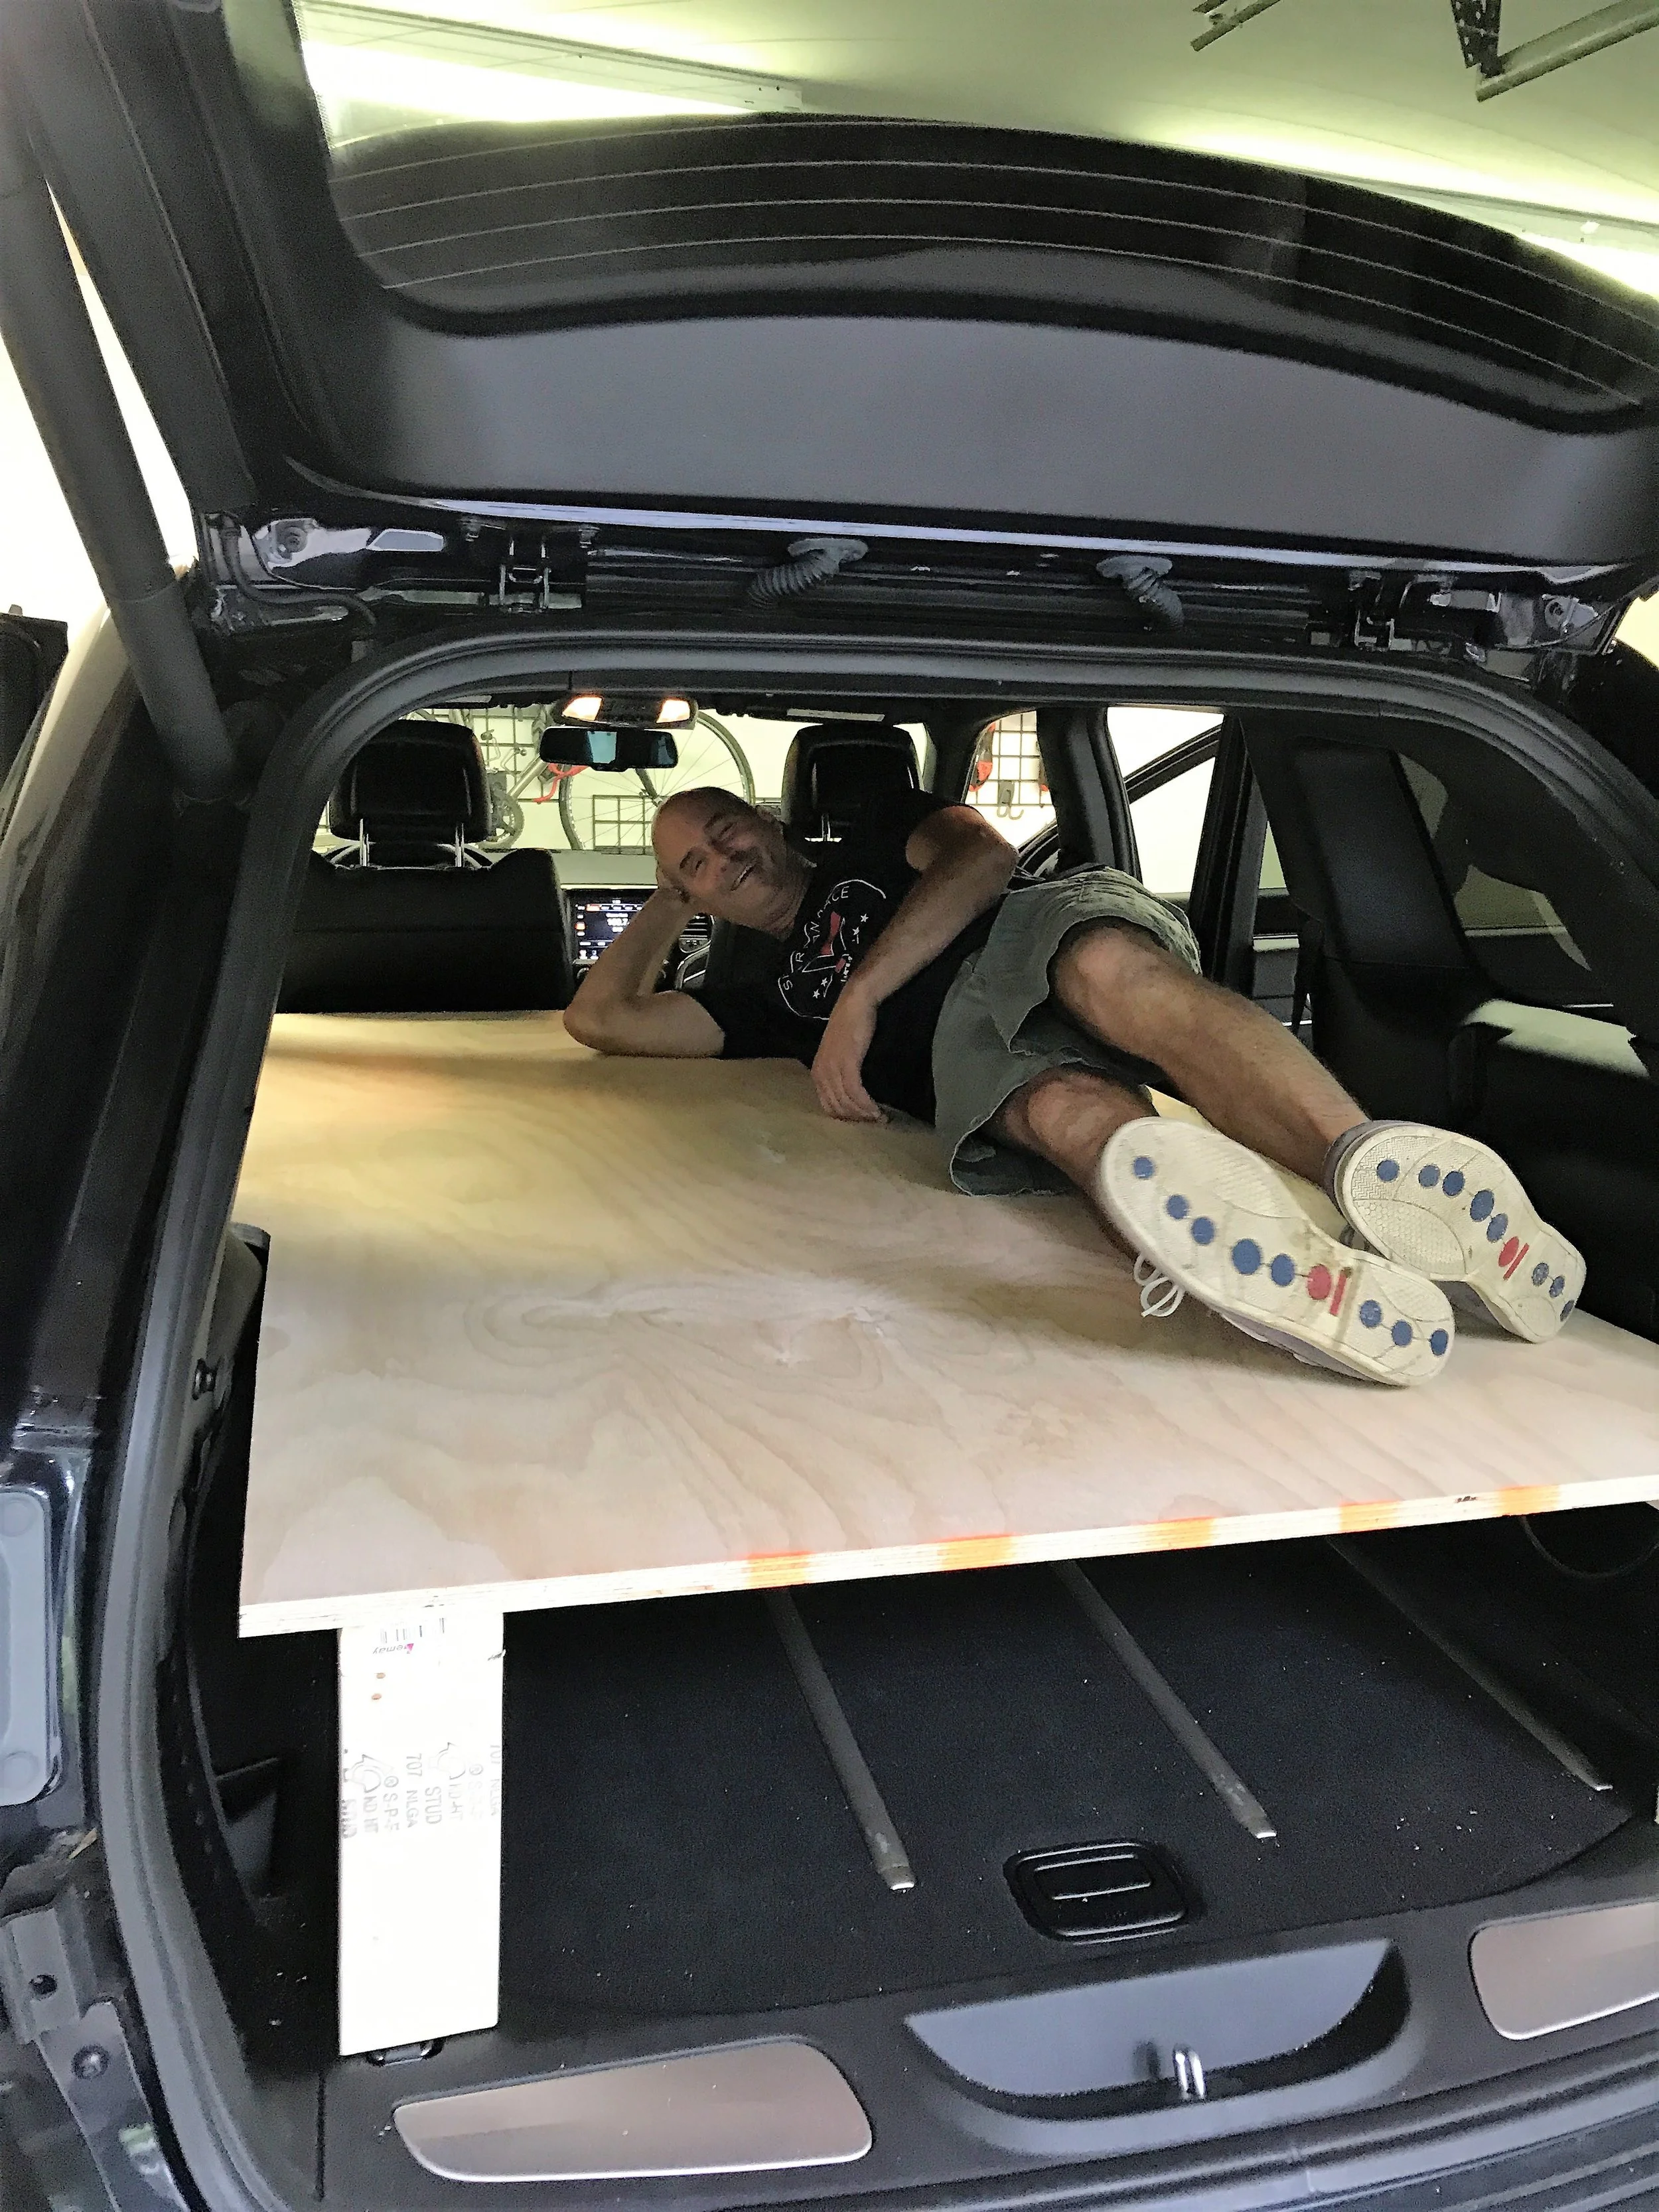
Yep, it fits
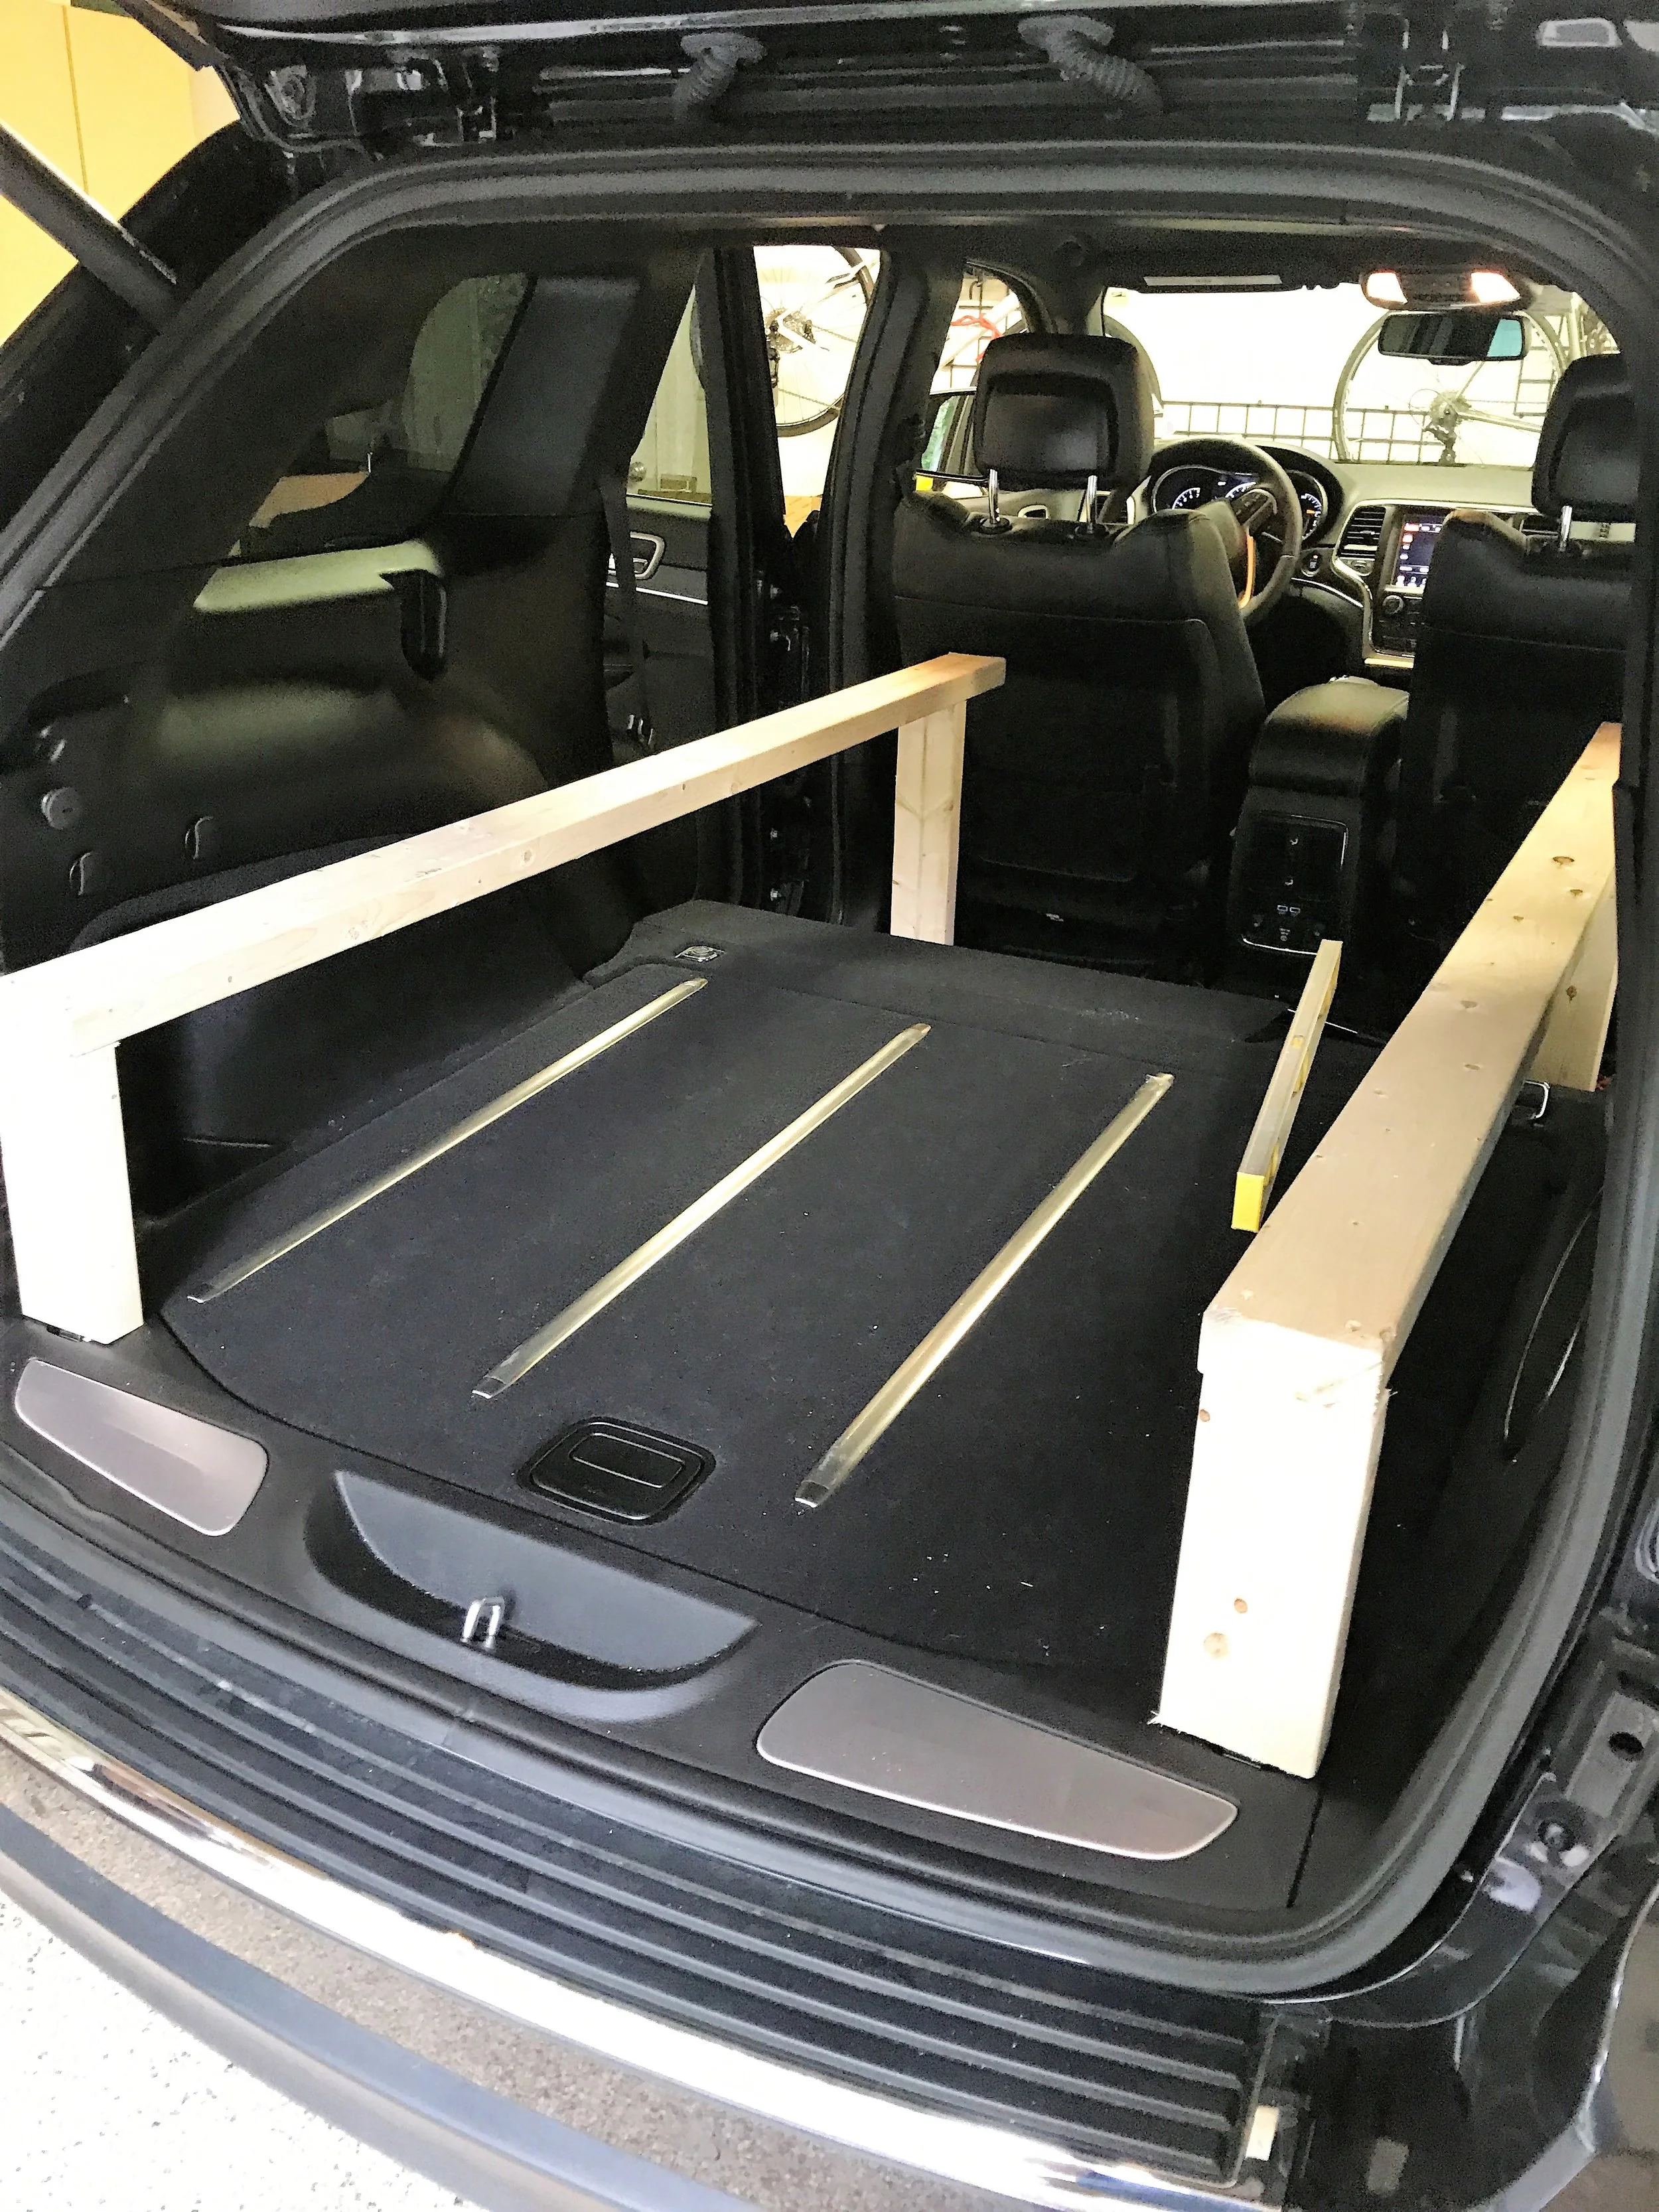
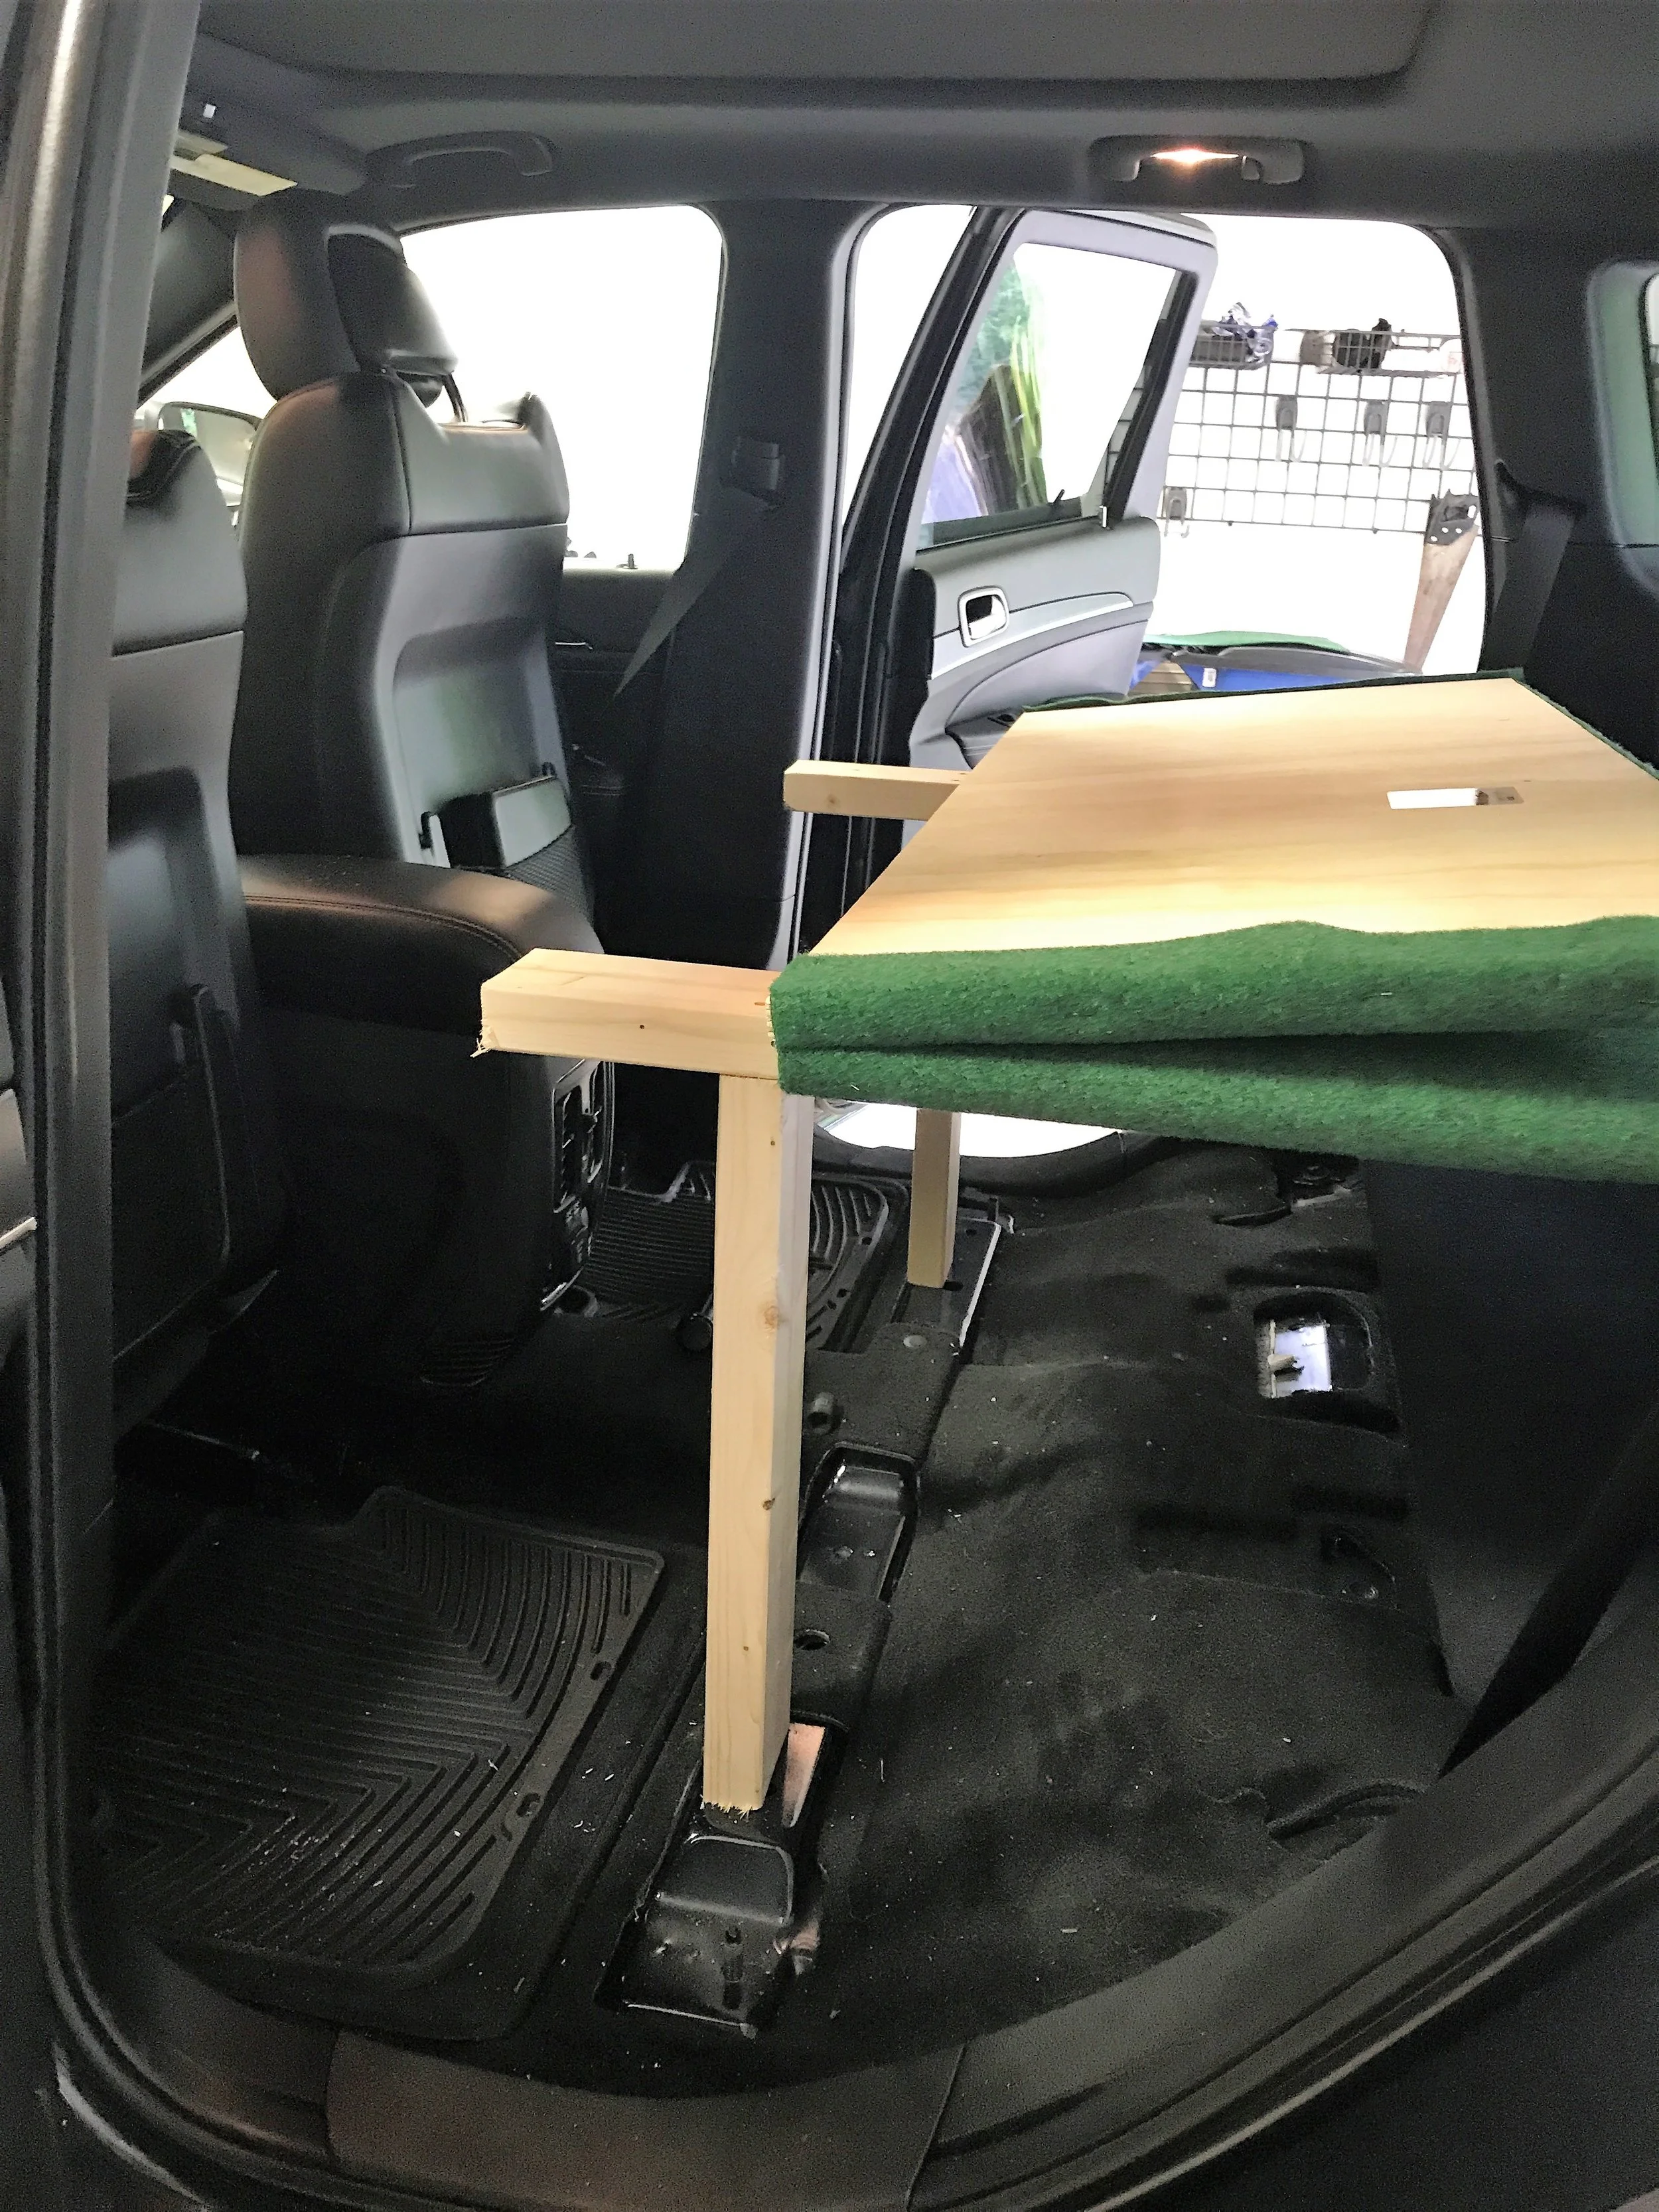
Step 8 (optional) – add a hinge
Because Nolan is 6’ tall we needed the bed to extend all the way to the front seats when they were up ALL the way. This was fine, but when we are driving we needed the seats to come back. So we added a simple hinge system so the top of our bed could fold up when we were driving.
Adding the hinge
Here, you need to measure how much headroom you have so the hinge can swing freely. Then a lateral cut across the board and screwing in our hinge. Note: you should put in the screws on the outside of the holes so it pulls the two sides tighter together.
We also decided to add a small support block so the hinge could rest easier without damaging the hinge hardware.
Final product with the bed folded up, thanks to our hinge
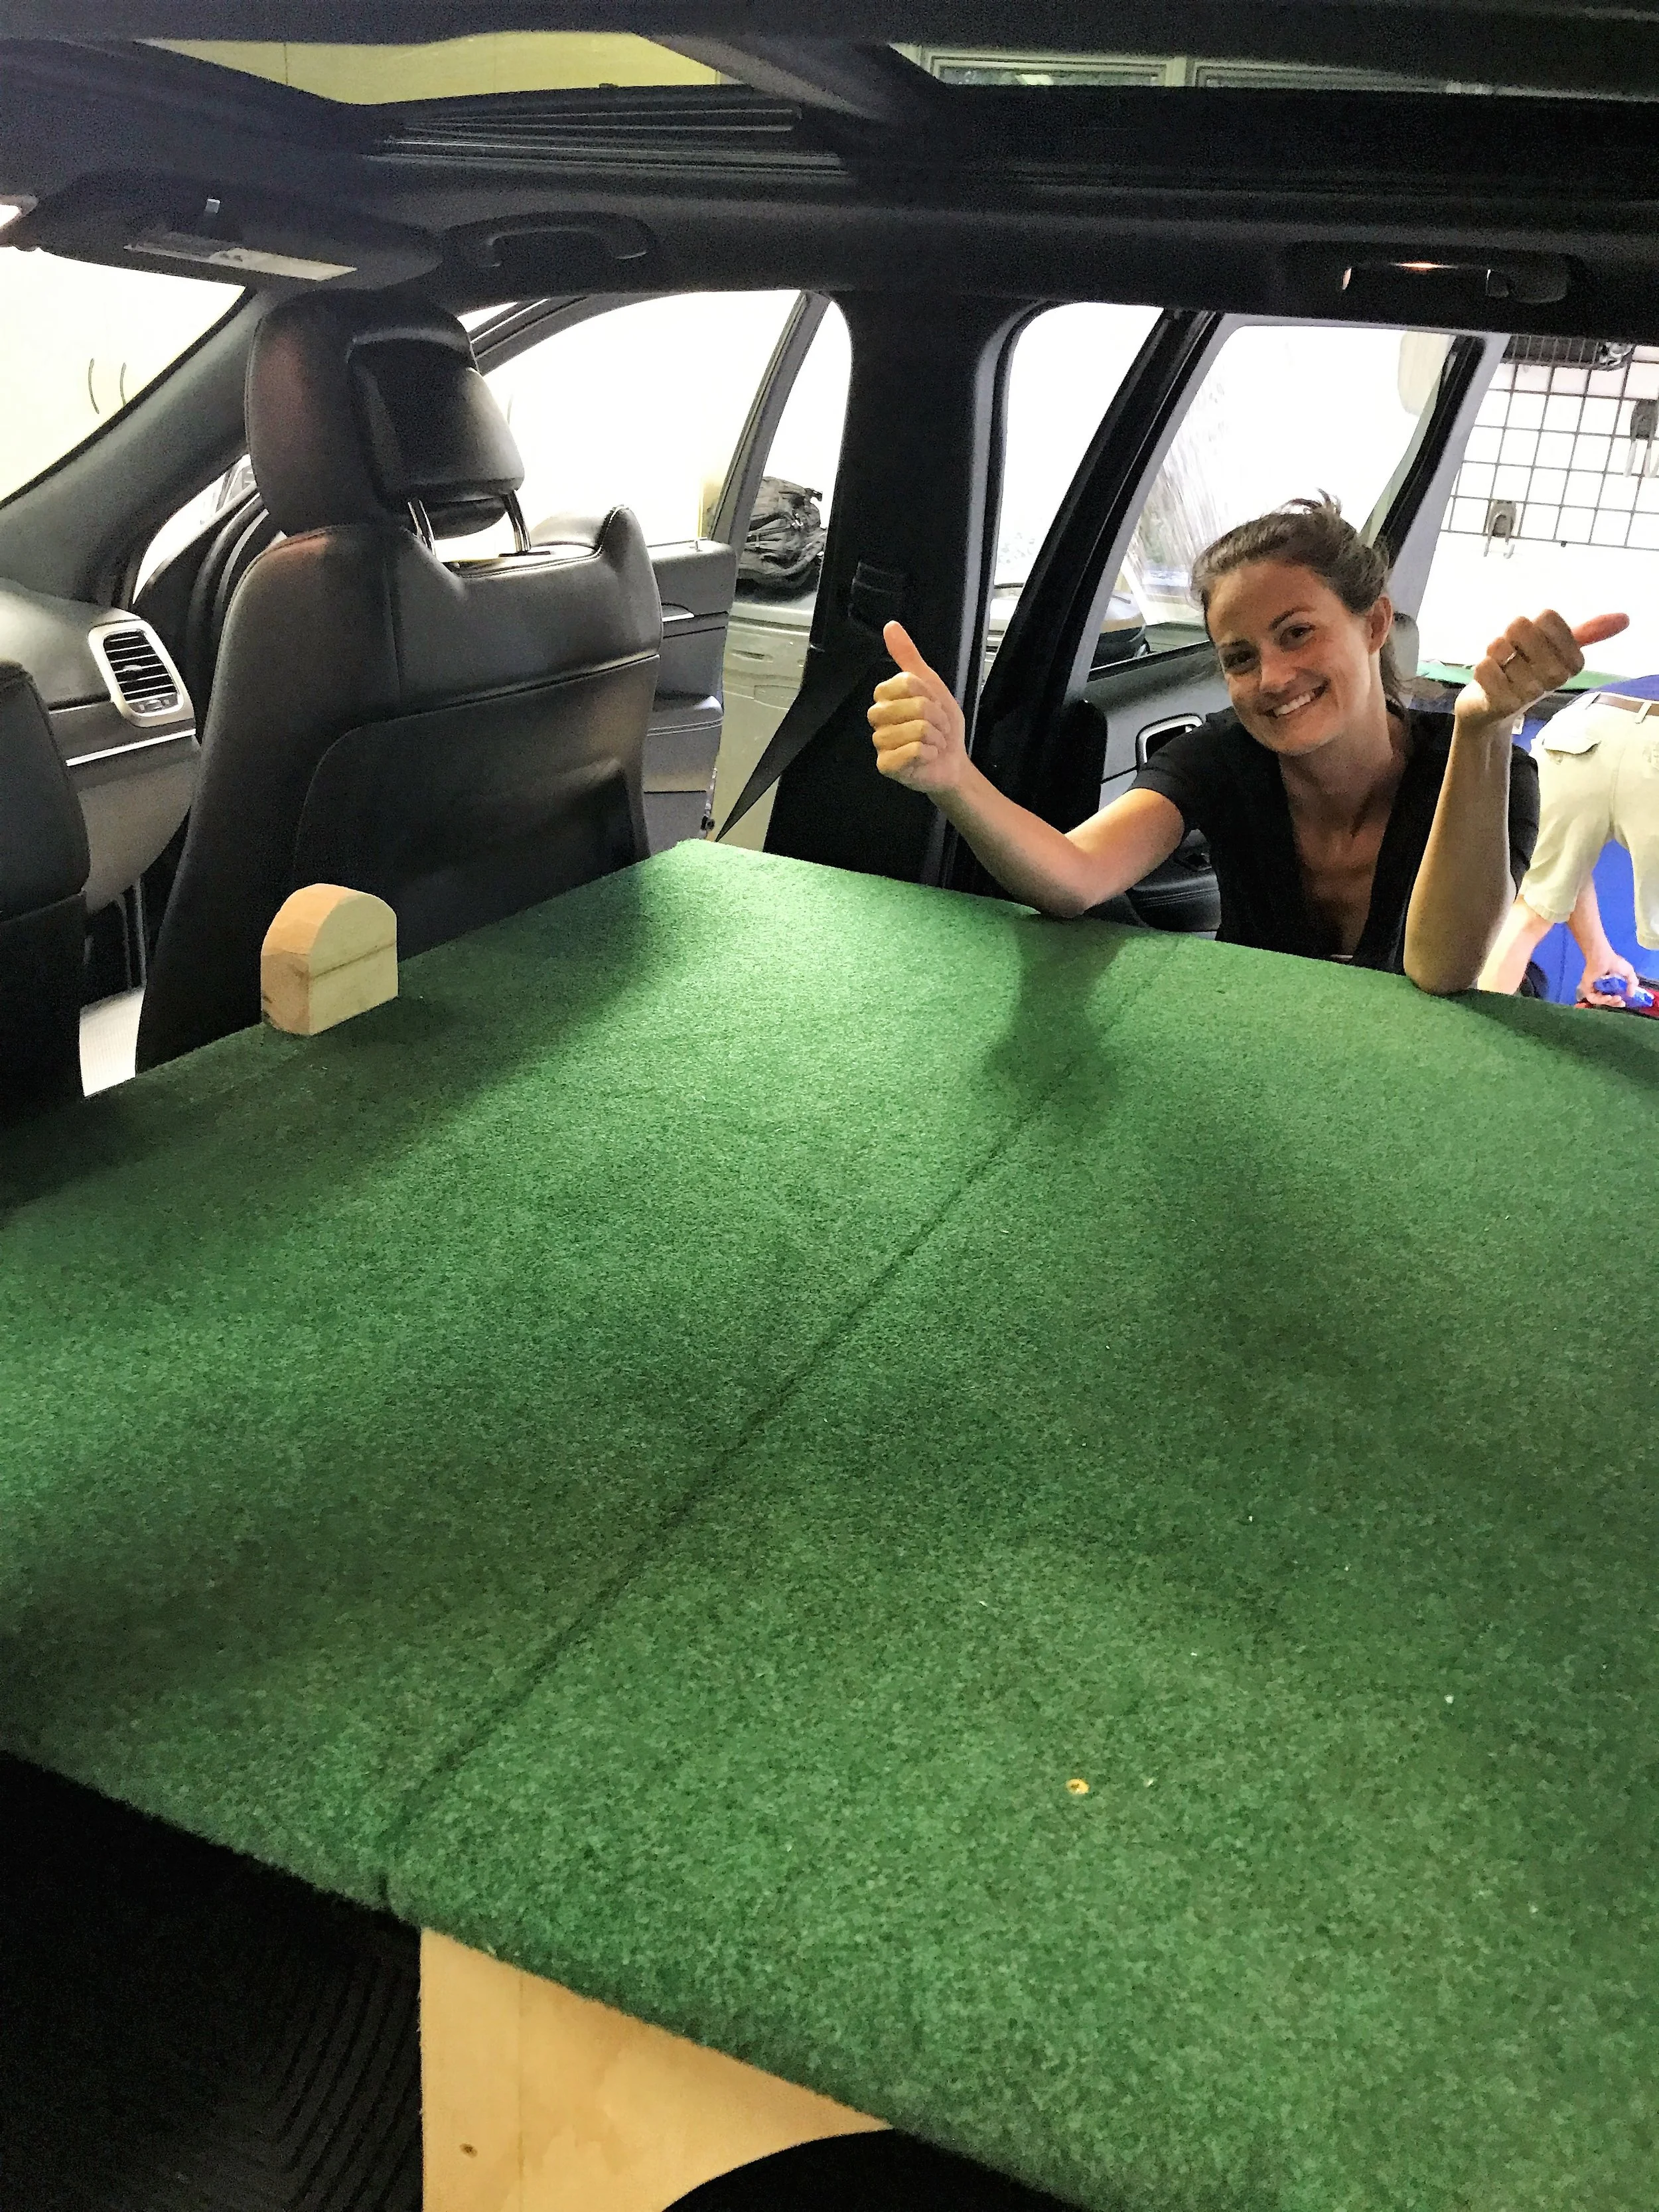
Step 9 – Add carpet/felt/whatever
We found a roll of green felt-like carpet for $20 at Loews. We decided to add this to the top of the platform so it would be a little easier on our sleeping pads and sleeping bags. We just cut it to size and used a staple gun to affix it to our platform. It looks like old school astroturf, but worked great! We also used the excess to put under our support legs to protect our vehicle.
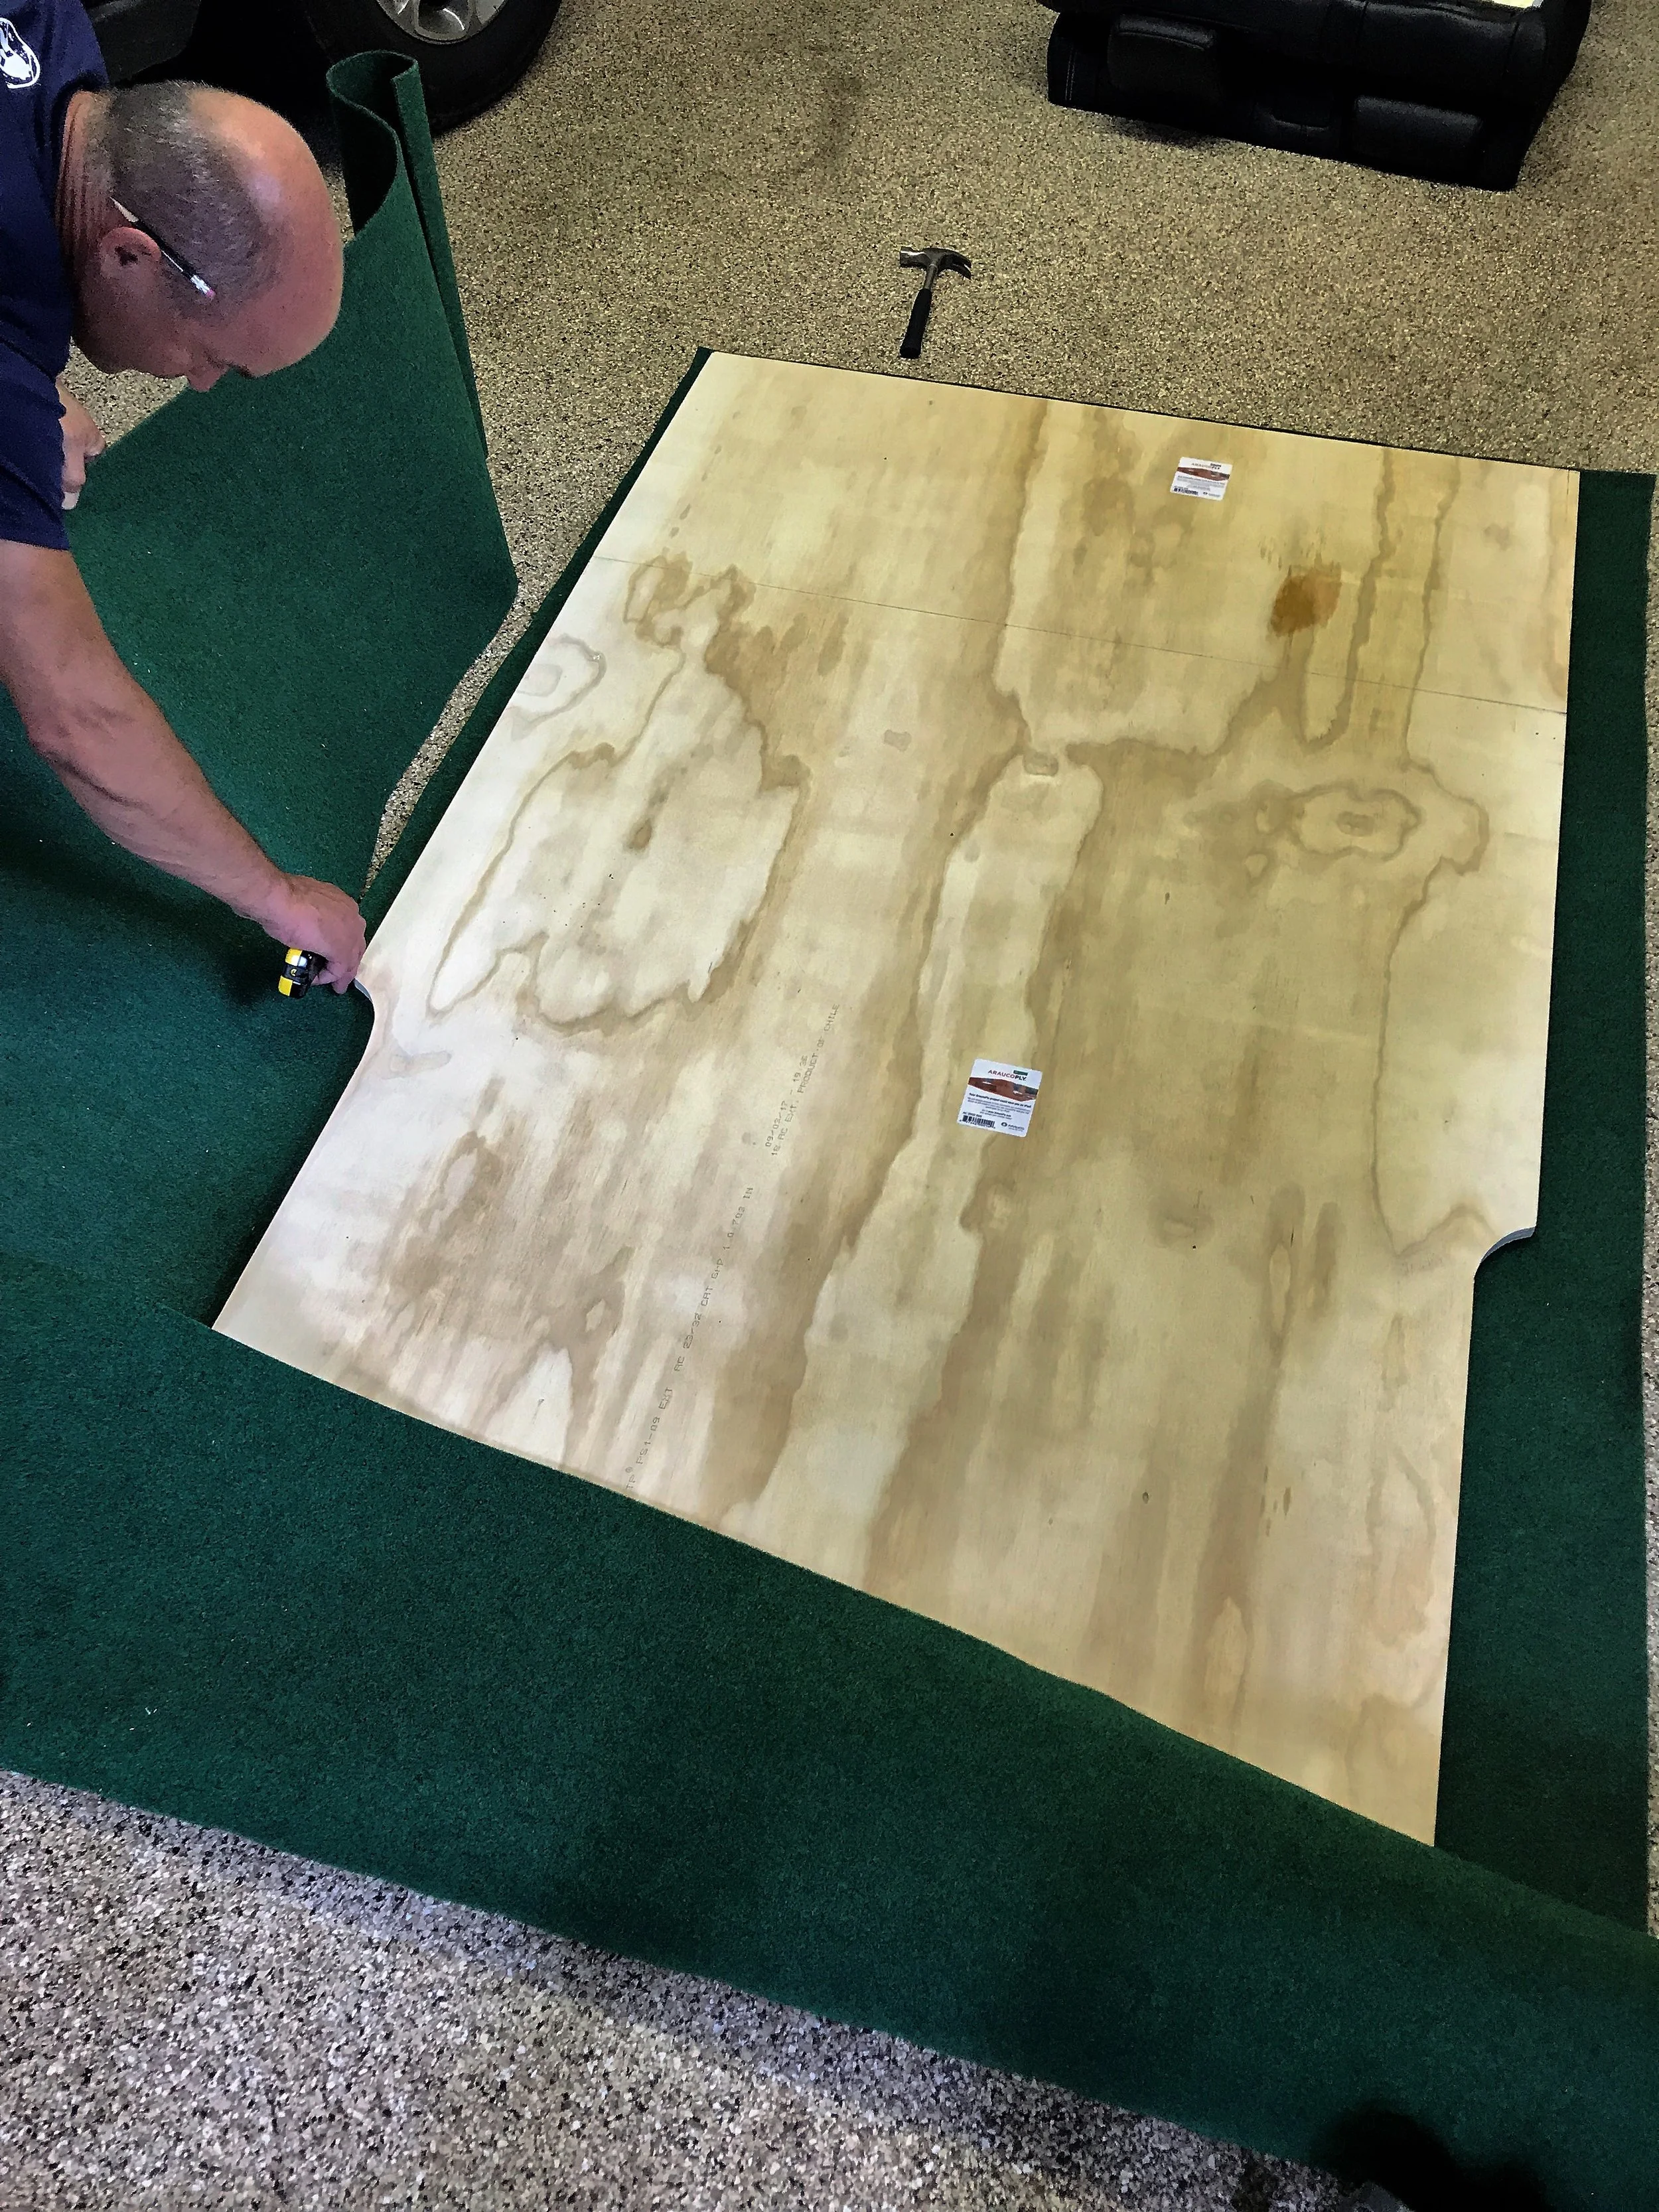
Cutting our felt
Step 10 – Assemble
After this we put it all together. We laid our platform back on our rails, ensured it fit perfect in every position (open, closed etc). and then added a few screws from the platform into the rails and we were pretty much done!
Looking good
Step 11 (optional) – Extra support and security
Ultimately, we decided to add a little extra support just to be safe. First, we affixed an arch support to each side of our front legs. Then, we added a few extra screws at the bottom of our front support legs so they would anchor in the holes where our rear seats used to be. This just made it so the legs would no longer slide free in the vehicle.
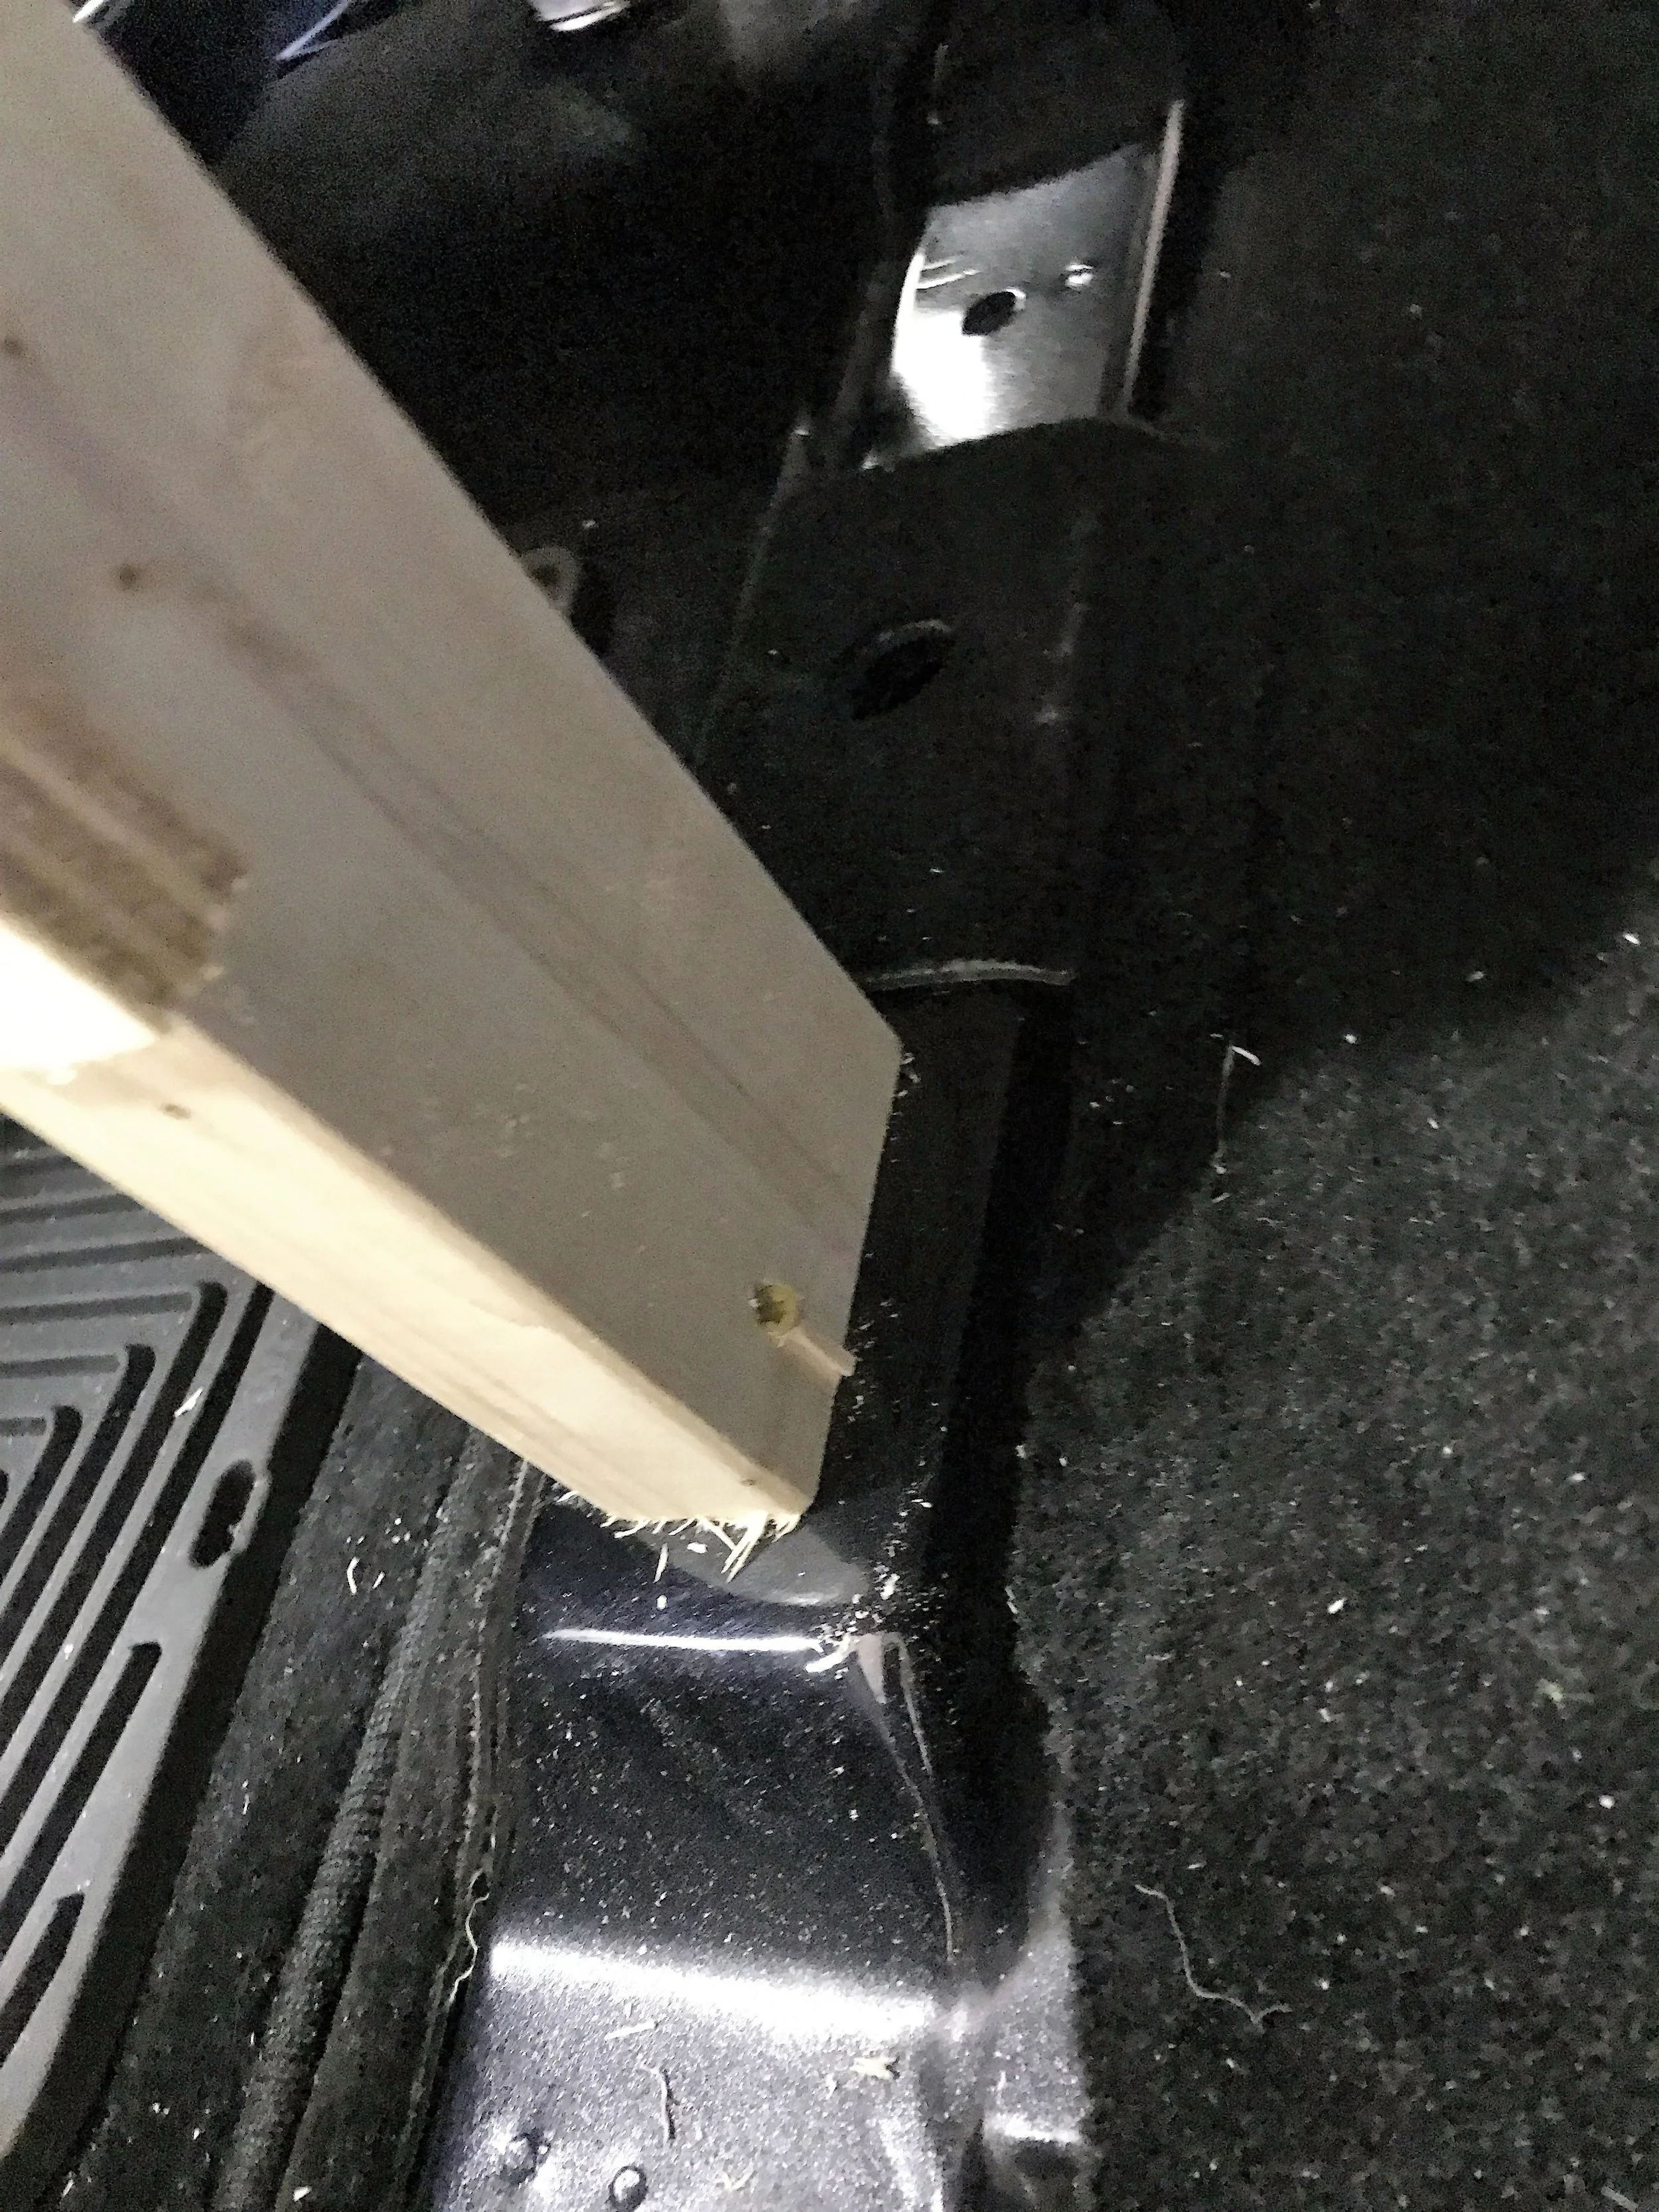
Secured the legs to the car, using the existing holes that held the rear seats
Step 12 – Enjoy!
This project was insanely easy and turned out awesome! We now have an amazing platform to sleep on, TONS of storage space underneath and the relief to know we have a place to sleep wherever we are.

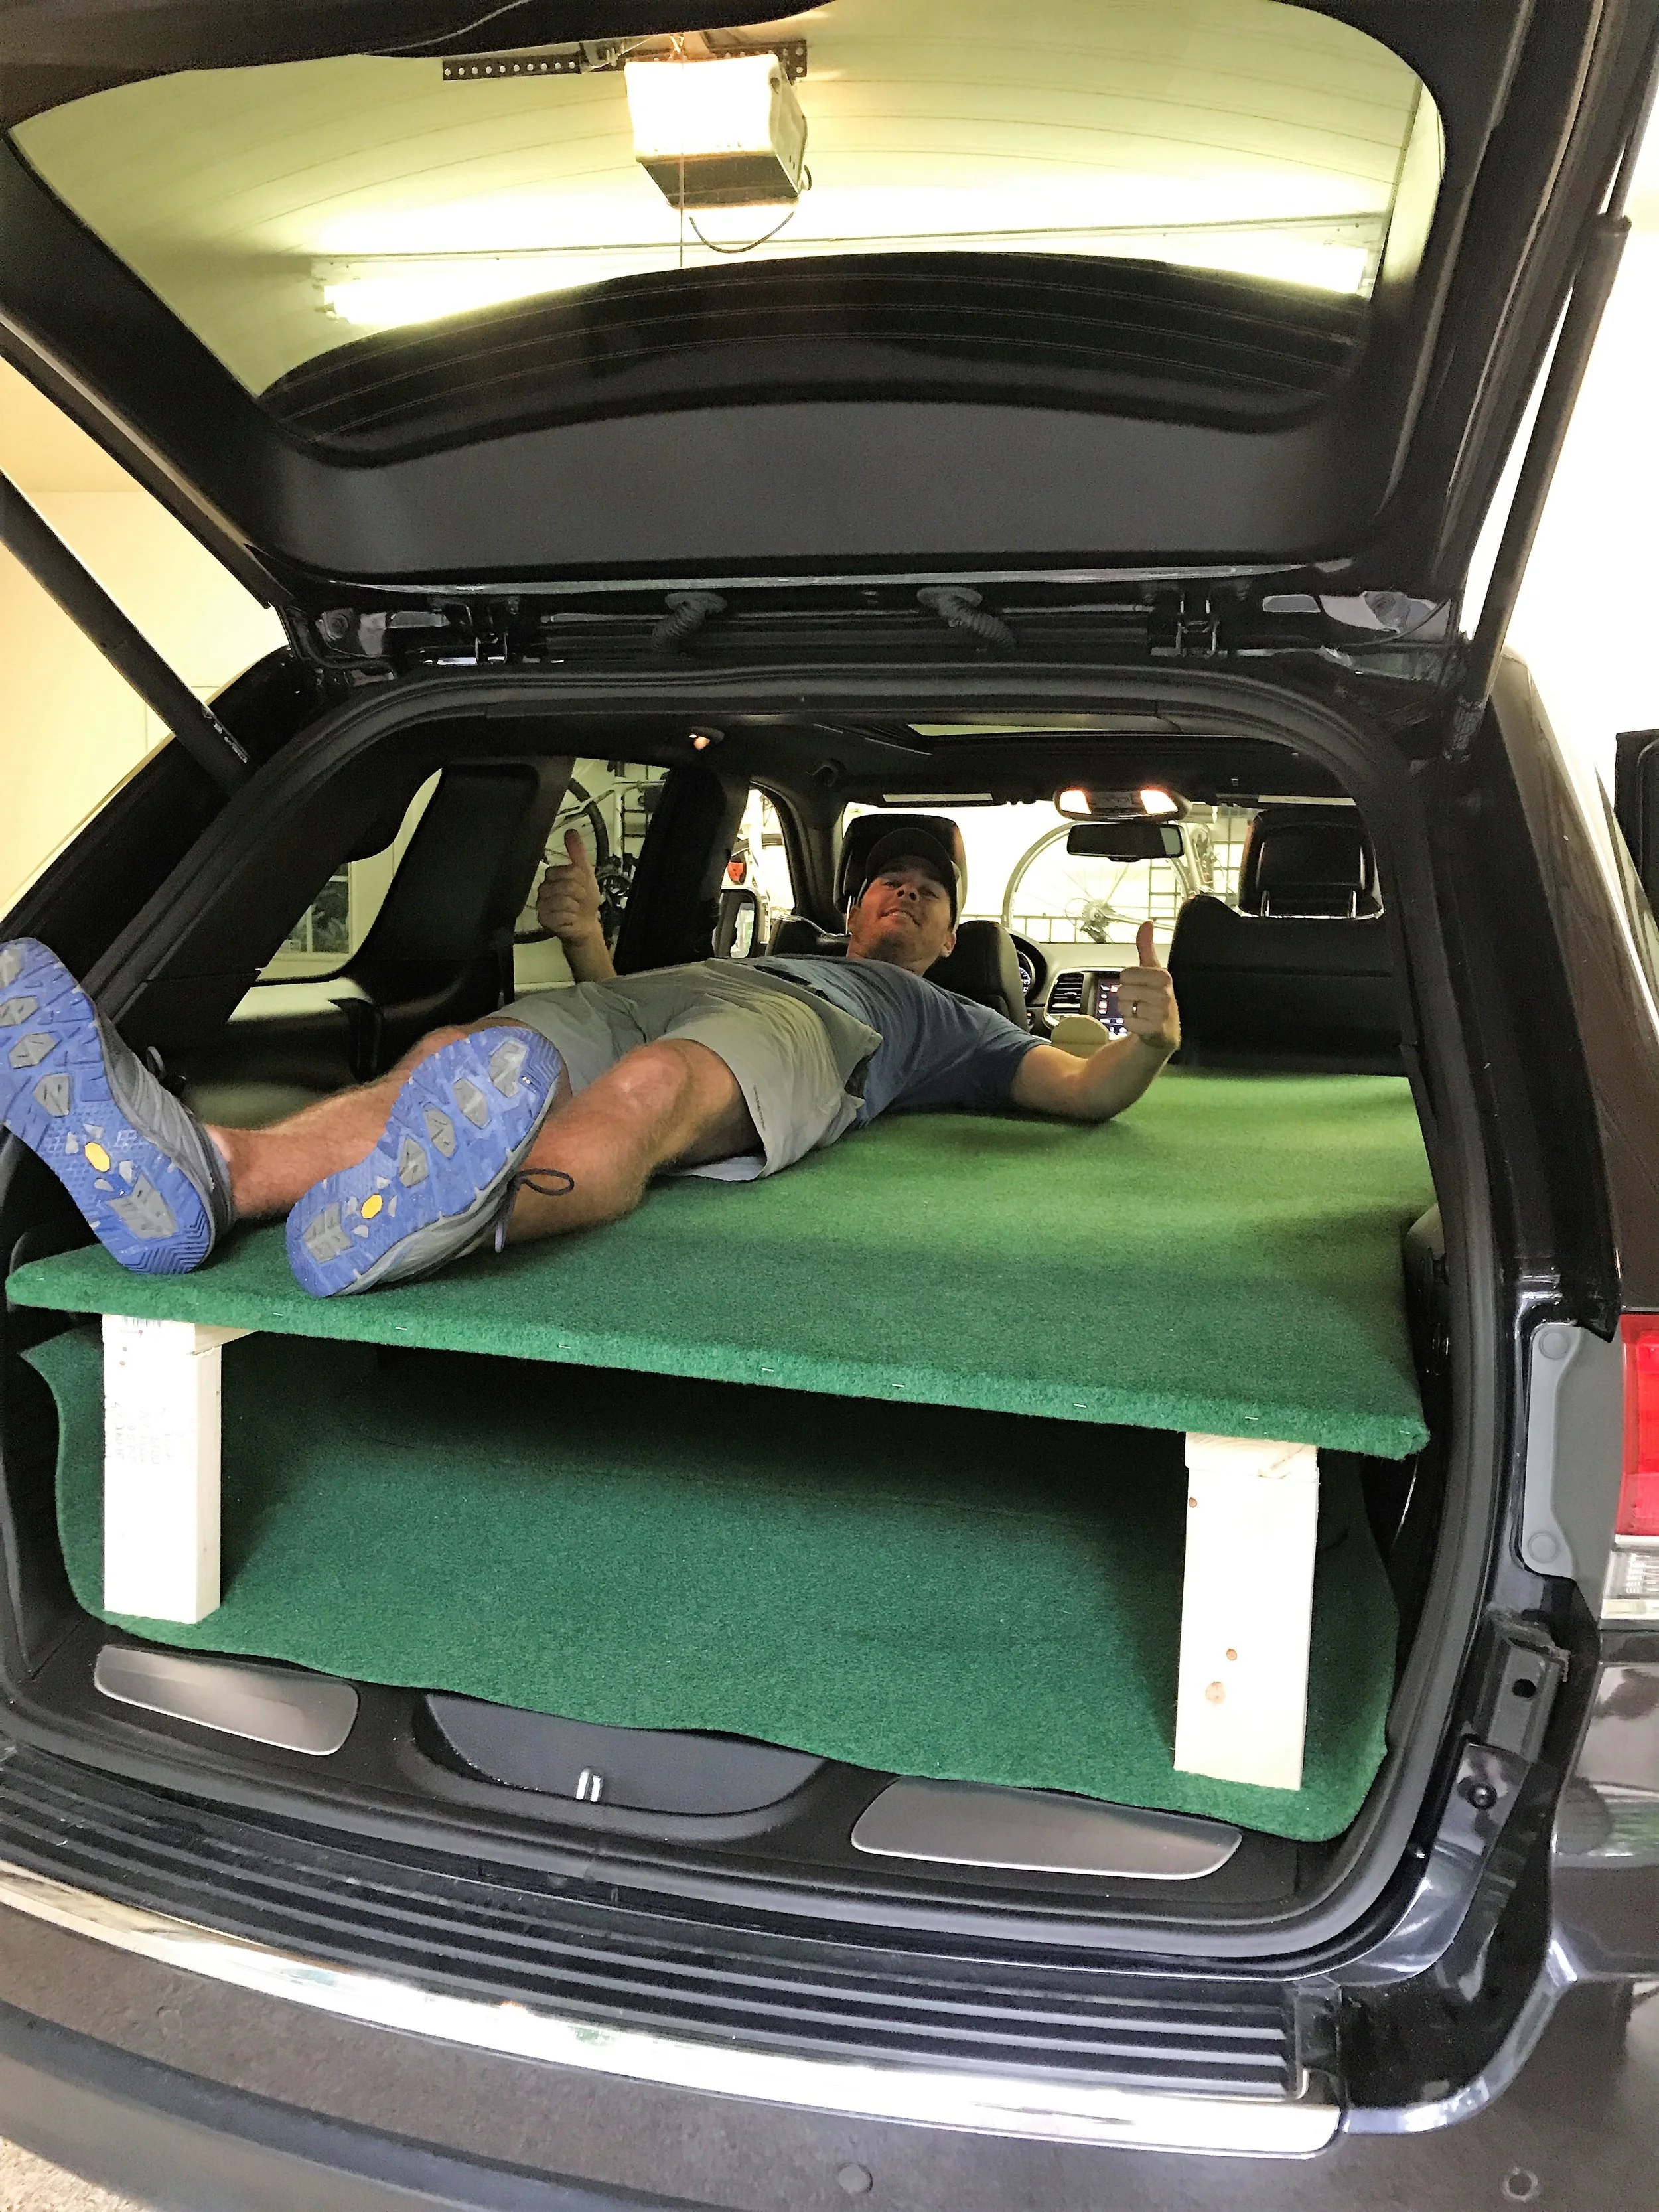
As I said before, we overspent. We got one too many 2x4’s and wayyy too many screws. Also, because the platform was so smooth, we probably could have done away with the luxury of our green turf. This project could easily be done for $60, we splurged a bit, but are very happy with how it all turned out.
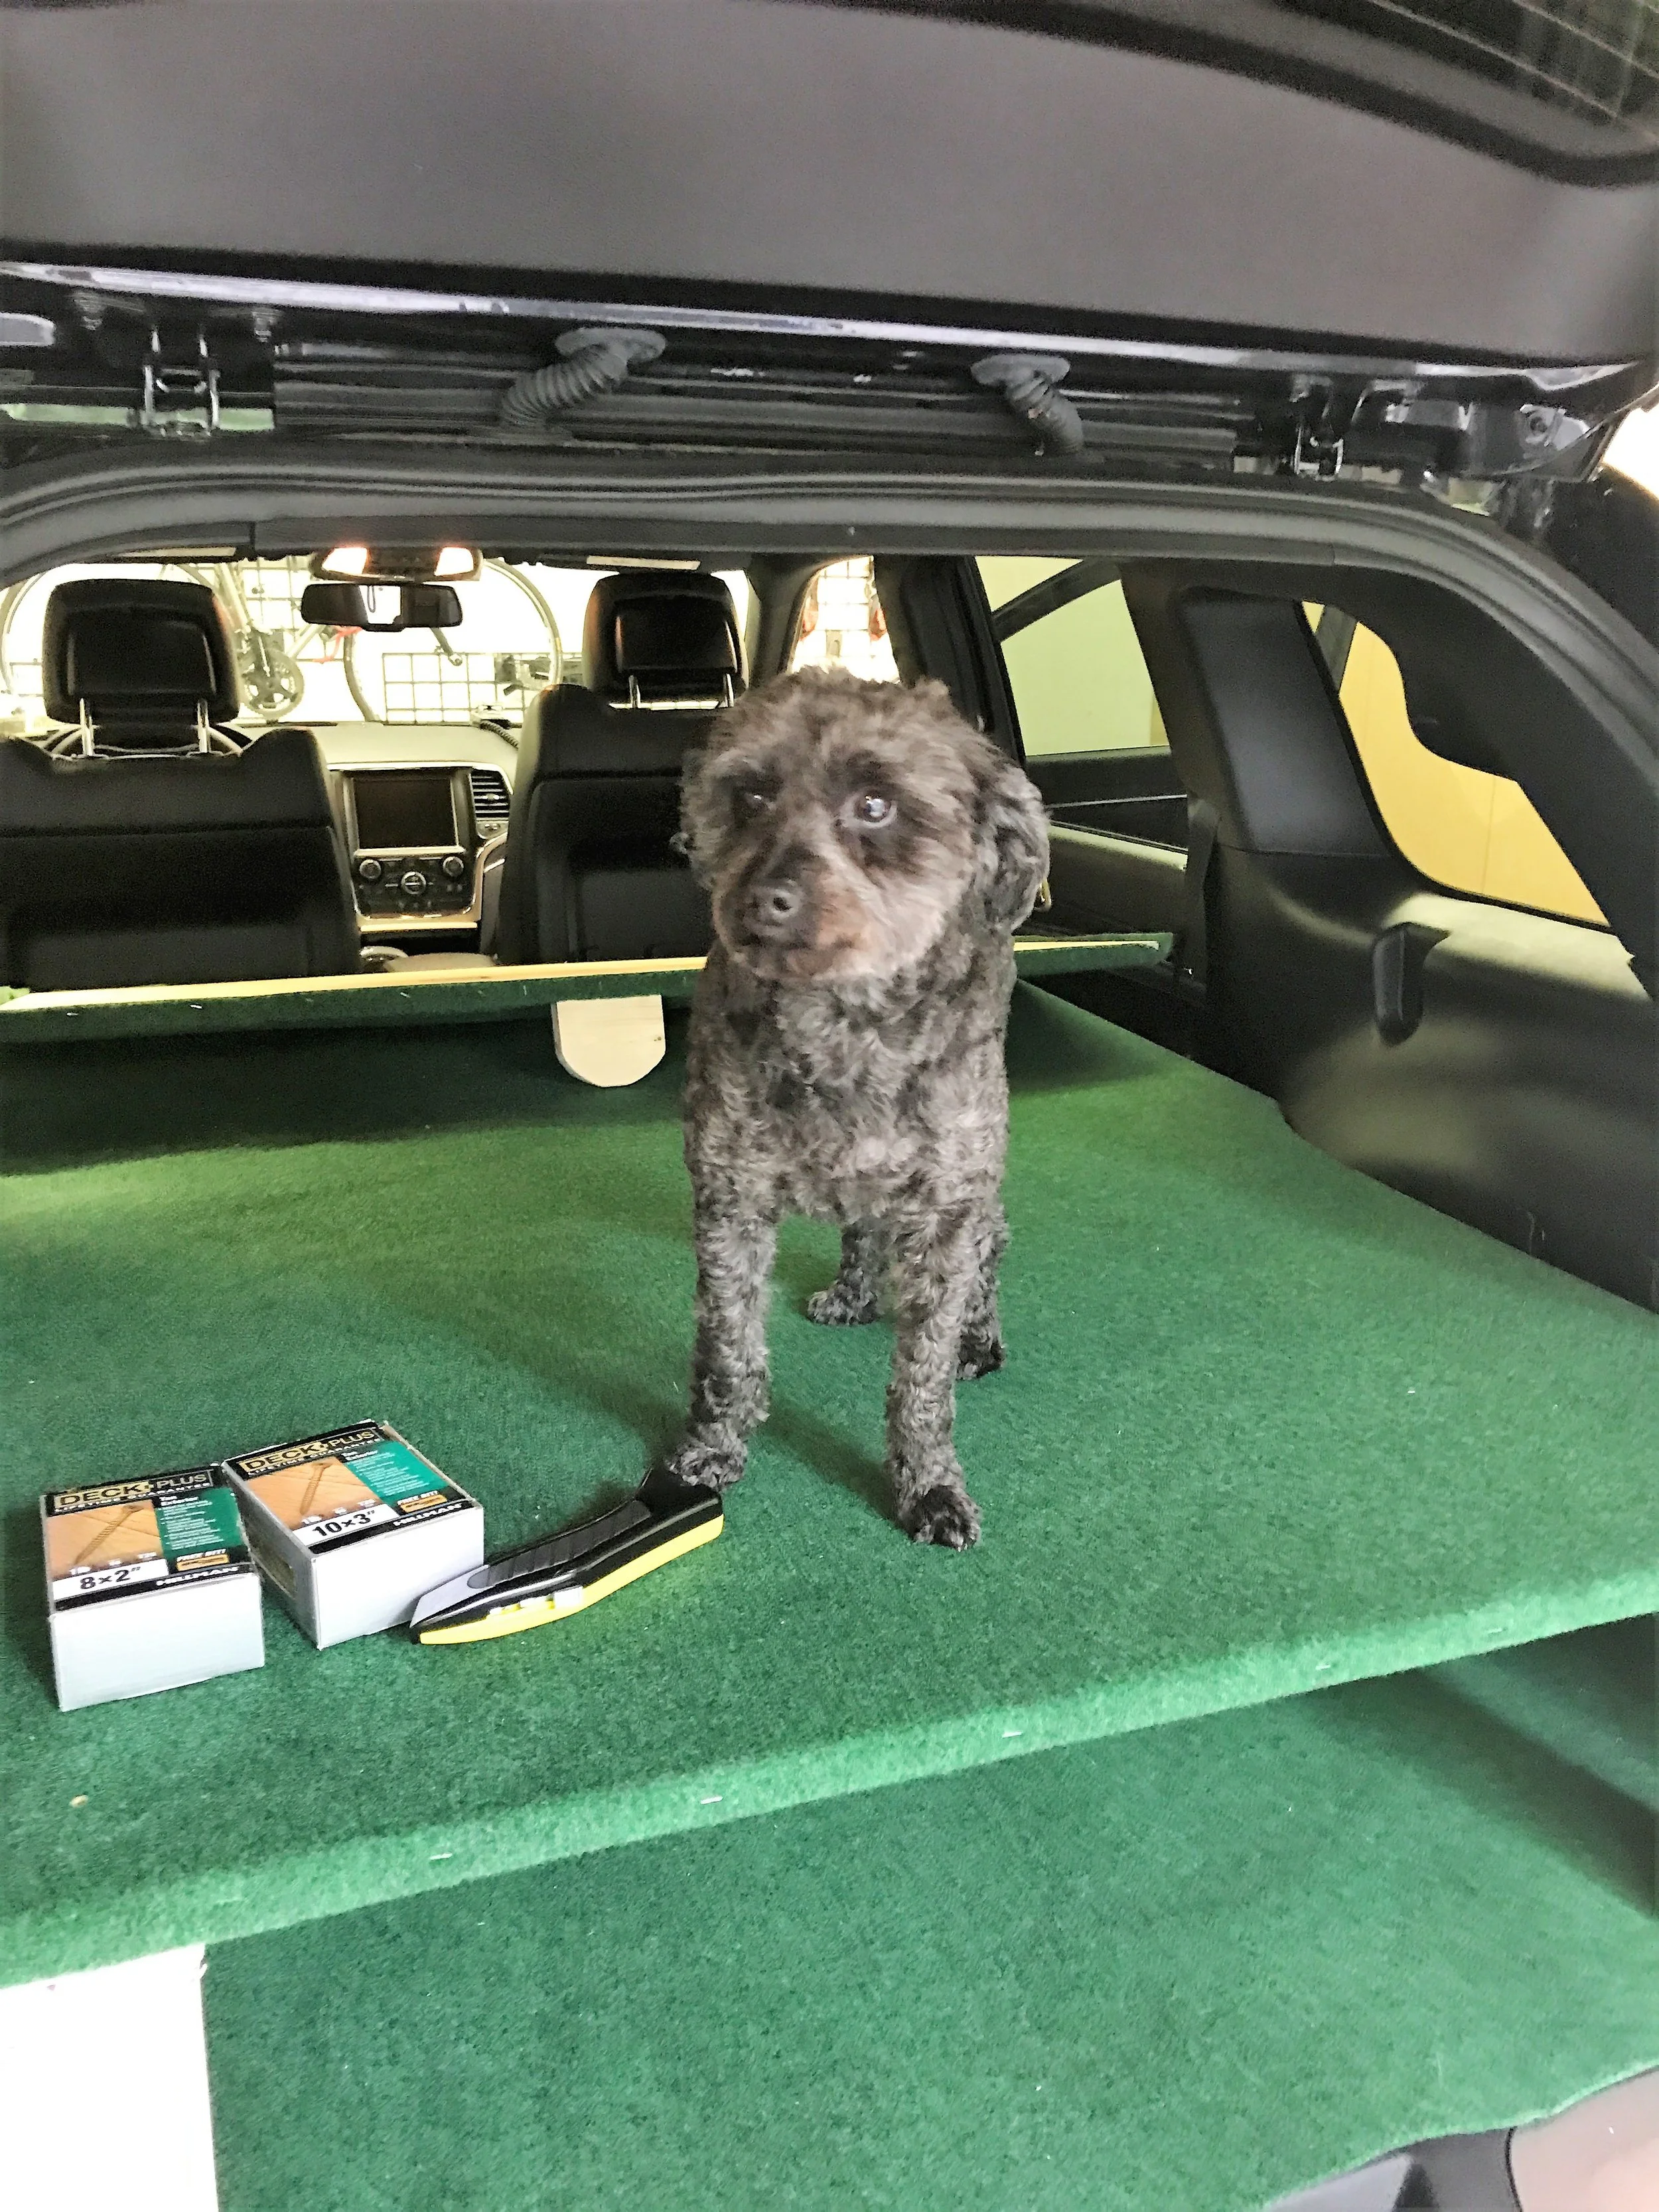
Our dog, Dexter, wishing he was coming along...
Latest Posts
-
February 2018
- Feb 5, 2018 Mainland China and Special Guests Feb 5, 2018
-
January 2018
- Jan 26, 2018 Holidays in Asia Jan 26, 2018
- Jan 18, 2018 3x in Thailand Jan 18, 2018
-
December 2017
- Dec 28, 2017 Myanmar Dec 28, 2017
- Dec 13, 2017 Luang Prabang, Laos Dec 13, 2017
- Dec 5, 2017 Vietnam Dec 5, 2017
-
November 2017
- Nov 27, 2017 First stop in SE Asia: Cambodia! Nov 27, 2017
- Nov 14, 2017 November 2017 Update Nov 14, 2017
- Nov 8, 2017 Texas & "The South" Nov 8, 2017
-
October 2017
- Oct 26, 2017 Quick Trip Through Colorado Oct 26, 2017
- Oct 23, 2017 The Many Parks of Utah Oct 23, 2017
- Oct 16, 2017 The GRAND Canyon Oct 16, 2017
- Oct 10, 2017 California Oct 10, 2017
- Oct 2, 2017 "The Great PNW" Oct 2, 2017
-
September 2017
- Sep 18, 2017 Oh Canada Sep 18, 2017
- Sep 11, 2017 Montana! Sep 11, 2017
- Sep 5, 2017 The Great American Eclipse Sep 5, 2017
- Sep 5, 2017 Wyoming: Devil's Tower, Jackson, the Tetons and Yellowstone Sep 5, 2017
-
August 2017
- Aug 28, 2017 Badlands to Black Hills Aug 28, 2017
- Aug 15, 2017 Kittanning, Chicago and Manchester Aug 15, 2017
- Aug 7, 2017 On the road again: Shenandoah, Luray and Deep Creek Aug 7, 2017
-
July 2017
- Jul 26, 2017 Back in the USA!!! Jul 26, 2017
- Jul 19, 2017 France – Our Last European Stop Jul 19, 2017
- Jul 10, 2017 Italy, Italy, Italy.... Jul 10, 2017
-
June 2017
- Jun 15, 2017 We <3 Switzerland Jun 15, 2017
- Jun 9, 2017 Spain Jun 9, 2017
-
May 2017
- May 31, 2017 South Africa May 31, 2017
- May 18, 2017 Ireland & UK May 18, 2017
- May 15, 2017 European Road Trip (Part 1) May 15, 2017
-
April 2017
- Apr 28, 2017 The rest of Scandinavia (minus Finland) Apr 28, 2017
- Apr 11, 2017 Amazing Iceland Apr 11, 2017